Monday, December 07, 2009

2009 - the year of not doing much!

This year has been pretty much as expected - with a large financial commitment towards the kids education and work being pretty comitted too. I haven't been able to do much to indulge my Triumph hobby. That said I was able to get over the Isle of Wight for the IoW Triumph Club event, not a driving event in the CT style, just an excuse to camp, drink and BBQ.
The next event was the "cancelled" La Carerra Caledonia proving that you can cancel a Triumph event but none of us will take any notice and just turn up and do it anyway. Dave pulled the rally Vitesse 6003VC out of the museum and we were off. Now those who know me will say they aren't surprised at the next revelation, but I was. You see I have found I have a big arse, it's quite wide, hip to hip - that means that it doesn't really fit in a narrow rally seat. 6003VC's seats really did hurt, squeezing my bony arse into them gave me a couple of nice bruises on either hip, bruises where seat and pelvis felt like they were meeting and trying to squeeze out any flesh between! After the first few hundred miles I realsied that I must be doing something wrong as I could no longer feel my legs! A bit of shifting about and trying different positions over the weekend eventually allowed me to enjoy the car. It's a full on rally machine and great in the twisty bits but crap on the motorway!
The only other event I was able do was the 10CR and I was keen to maintain my commitment to this event. I had intended to take the PI but with crew changes I found myself partnered with another team. It's always difficult to know how well you'll get one with others in an endurance event, I'm a pretty relaxed, happy go lucky kind of guy but not everyone likes that! This time I was driving Nigel Gair's car with Dave Tongue, I'd not crewed with either of these guys before and it's fair to say I didn't know them well. However, this has to go down as one of the best laughs I've had for ages. The boys really were out to play and with constant banter, jokes, bad language, non-PC inuendo and mickey taking plus a set of strictly imposed rules we got on well. Oh, the rules were all related to engine speed, tunnels and narrow streets - 6500 rpm was compulsory. I can't remember ever been told off for driving a car "too carefully" by it's owner - Mr G, I salute you ;-)
With such a frugal year you'd have thought I would have had plenty of time on my hands, sadly not - my work has sent me to many different places this year and usually at a moment's notice! I seem to be one of the few people who is prepared to do the "dirty" jobs and as such I've been all over Europe as well as India this year. It looks set to continue with the European role likely to be extended and the India trips stopped.
What that has meant is that I do get home on weekends more and am in control of things a little more. All that left me with time to fulfill a committment to administer the RBRR entries and help Tim out with the organisation. I really enjoy this but I am always worried that I won't be able to fulfil the commitment - I hate to let people down so I try to take on things I know I can do - I've seen hassles caused by well meaning people who walk away from things half way through. I've got a lot more confidence in this now and I know I can continue for as long as there is a need. It's something I can do between work, travel, family, etc. It's also my way of putting something back into this fine club.
Next year holds pretty much the same for me as the financial committments don't end in 2010 but I should have more time to myself and that means working through the list of jobs on the car and getting her out and about a bit more.
As for events well I will go back to the IoW and I've got a drive lined up with messers Pearson and Kipping on the RBRR - the rest is fluid! I would like to have a go helping organise a navigation rally just to learn a little more about these. I've no idea how feasible this is but it is something that's always interested me. I just hope I get the time!

Monday, November 23, 2009

Triumphant in Paris

I took the family to Paris for the weekend on the Eurostar, part of Zoe's 18th birthday present. She wanted to go up the Eiffel Tower, as you do. Anyway, on Sunday as we were walking away from the tower across the Seine and towards the Champs Elysees we were greeted by several French Triumphs.
Unfortunately I was quite a distance away when I saw them but I had the camera in my hand so snapped a few pictures. We saw more Triumphs as we were breakfasting on the Champs Elysees, they were driving towards the Arch de Triumph - of course! It was nice to seewhat looked like a nice range of TR2/3, TR4 or possibly a 5, a couple of TR6s, a Stag, an MGA and I think an MGB GT

I must say they weren't hanging about and did look nice in the crisp morning - all roof down.

Friday, November 13, 2009

....and then....

... another bundle of post this morning and we're up to entry number 69, Here's the list so far


Entry Name
1 Mike Bishop
2 Bill Davies
3 Nick Jackson
4 Claire Hill
5 Jim McGuiness
6 Colin Radford
7 Jonathan Clegg
8 Steven Burrows
9 Floyd Pattie
10 Andrew Johnson
11 Jayne Spicer-Adams
12 Malcolm Swingewood
13 Jason Chinn
14 Craig Bennett
15 Alex Chandler
16 Brian Cox
17 Andrew Dann
18 Clive Senior
19 Tim Hunt
20 Malcolm Philpott
21 Jessica Brake
22 Roger Hogarth
23 Dave Kirk
24 Yossarian Gay
25 Keith Dandridge
26 Allen Foster
27 Graham Whiting
28 Wayne Scott
29 Michael Helm
30 Mark Bland
31 Howard Brissenden
32 Dale Barker
33 Tom Key
34 Mark Mclean
35 Doug Foreman
36 Tim Bancroft
37 Allen Walker
38 Pauk Bodiam
39 Richard Brake
40 John Hayes
41 Ashley Mills
42 Andrew Shirley
43 Keith Bennett
44 Jayson Murray
45 Robert King
46 Alan Pettit
47 Andrew Pearce
48 Russell Banyard
49 Dave Langrick
50 Steven Needham
51 Mike Barrett
52 William Columbine
53 Dave Marshall
54 Andrew Plews
55 Reg Barton
56 Caroline McGrath
57 Lloyd McNeill
58 Steven Radley
59 Rob Southern
60 Tim Walker
61 Mike Weaver
62 Joe Welling
63 Nigel Gair
64 Ellis Stokes
65 Francis Moll
66 Andrew Moll
67 Carl Shakespeare
68 Sean Bradley
69 Martin Burrows

Tim's set up a RBRR Blog for publishing this sort of news so I'll go and find that and follow up on there from now on.

Check out http://ctrbrr2010.blogspot.com/ for all RBRR news, updates and notices from the organising team.

Thursday, November 12, 2009

The first 36 entries are in

For those of you pestering me for entry numbers, here are today's entries, all 36 of them. Not bad for the first day. This is the order in which I opened the bundle of envelopes, the only ringer is me, I gave myself number 13 again

1 Mike Bishop
2 Bill Davies
3 Nick Jackson
4 Claire Hill
5 Jim McGuiness
6 Colin Radford
7 Jonathan Clegg
8 Steven Burrows
9 Floyd Pattie
10 Andrew Johnson
11 Jayne Spicer-Adams
12 Malcolm Swingewood
13 Jason Chinn
14 Craig Bennett
15 Alex Chandler
16 Brian Cox
17 Andrew Dann
18 Clive Senior
19 Tim Hunt
20 Malcolm Philpott
21 Jessica Brake
22 Roger Hogarth
23 Dave Kirk
24 Yossarian Gay
25 Keith Dandridge
26 Allen Foster
27 Graham Whiting
28 Wayne Scott
29 Michael Helm
30 Mark Bland
31 Howard Brissenden
32 Dale Barker
33 Tom Key
34 Mark Mclean
35 Doug Foreman
36 Tim Bancroft

Now a word of caution - I have yet to fully record all the details and check membership details so if you see your name there and you haven't renewed your membership, pull your finger out! Put simply, if you or one of your crew are not a Club Triumph member then you will not be accepted onto the run. This year I am going to have to be strict on this.

As soon as I can, I will create the web pages to upload onto the proper RBRR website and provide the usual fuller details of crews and cars.

The Postman has been.......

....... and left me with a massive bundle of entries! I will be opening them later today and will start to create the entry list.

Wednesday, November 11, 2009

RBRR - the madness starts

For those of you sending me PMs on the Forum I am unable to respond as I am returning from a business trip to Istanbul. I will reply to you all when I get home tomorrow.

UPDATE - I am now home. My magazine is here and my entry is in :-) Of course I won't take entry number 1, where's the fun in that?!

Tuesday, September 29, 2009

It's been a long time

Much water under the bridge and miles covered so I thought a quick update was in order.
PI Pumps - the eBay listing generated more interest than I could have imagined and I have been making ans selling pumps to the Formula 5000 and classic racing fraternity! One to South Africa to go on a Chevron (whatever that is) and a whole package of stuff to a nice guy in California to go on two cars, a Brabham BT - 21 with Lotus Twin Cam and a 1970 Leda F 5000 - I've sourced and supplied seals, O rings, pumps and motors. My little test rig has been running for days! The original idea of selling enough to pay for the development costs is long gone and I broken even with the South African sale alone. All has cushioned the eBay disappointment. Trouble is, the pump I built for my car went to California!
Never mind, Mike, 4x4 2000, Weaver came up with a box of pumps for me and I have the raw materials to make a few more.
I've sourced the O rings for the fuel injectors too although I had to buy a minimum quantity so I'm going to do a batch of those soon. Although I don't have a lot of core so if you want to unload any rebuildable injectors get in touch. I've even figure out the original finish and I think I can replicate it.

10CR
Well the plan to use my PI and do the event with Dave Pearson evaporated, to be fair I bullied him into it or rather I tried and by the time I accepted that he didn't want to do it, all the trusted crew were teamed up with others. I did the last 10CR with an unproven co-driver and whilst we had no real issues and got along well it wasn't really the same as doing it with a fellow Triumph enthusiast. Tim Bancroft called me the evening that I accepted Dave wasn't going to change his mind and asked if I knew of anyone looking for a seat as Nigel Gair was considering a third man in his car. It took about a nano-second for the penny to drop and within 30 minutes I had spoken to Nigel and was "in" with him and Dave Tongue.
What a great move to make - thanks Tim and big thanks to Nigel and Dave - we had a great time, a real laugh a minute. There were times when we couldn't stop laughing and on at least one occasion, the bizarre tale of 3000 perverts in Wembley Stadium all waiting for a Russian Lesbian pop group had us laughing so much that we had to stop the car and park until the laughter subsided. Such infantile games as the naming of ever bowel movement kept us amused - The Tracey Island, The Everglades, The Apollo 13, The Connector - there were more, so many more.
The car was superb, I have to say that I did not drive it well at first because I was far too careful with it. Until that is that Nigel gave me those memorable instructions "You're just not revving it enough, stick it in first and don't touch the gear lever until you see six and half thousand". There were compulsory down shifts for all tunnels and narrow streets.
We had a blast, a real blast - we never once argued, even though we did get a little "off route" at times. The car was great, the only issues were the chin spoiler grounding out on tight hairpins, the synchro on third got a little lazy and the HID headlamps refused to keep their aim settings - apologies to anyone we followed! I'd gladly go anywhere with Nigel and Dave.

World Cup Rally and Rally cars
A couple of things have happened on the research front - I was contacted by Graham Robson the author recently, He wanted to use some of my photos for a forthcoming book to be launched on the 40th anniversary of the World Cup Rally. He's done quite a lot but it's not yet complete. I shared with him my photo collection and some of my research to date.
I also went to see Keith Baker, navigator in the privately entered 2.5 PI of Brian Englefield and Adrian Lloyd-Hirst. Keith lives near Norwich so when my meetings were done I drove out to see him. He produced a collection of photos of works and private cars he'd navigated in including the Kim Mandeville Mk1 2000 that recently sold on eBay. If anyone knows who bought it then perhaps they could put me in touch as Keith has some info and photos - that car having been extensively reworked by Brian and Keith. We went through the photos and chatted away for ages, Keith will scan some photos for me and I'll share them in due course.

Work
Here it's all change, I was due to be in India last week and I'm not! I picked up my tickets on the Wednesday only to go to a meeting to be asked if I could do another job - starting the following Monday (ie the day I was supposed to be flying out to India), instead I would be flying in the opposite direction to Dublin.
So, to cut a long story short I now find myself as the Global Claims Leakage Manager covering mainly Europe but a little of Canada thrown in for good measure. The job will take me to France, Italy, Ireland, Poland and Turkey - it's a departure from what I have been doing but along the same lines. Meet the people, create some relationships of trust and use those to get the Global Agenda to the right people who will make it happen.
Leakage is not something to do with bladder control, it's all about spend control - leakage is when we pay out on claims where we shouldn't or where we fail to recover money when we should. The bottom line is it's waste. It erodes profit and therefore pushes up prices - it's no body's friend.
Anyway, this is a Triumph blog so enough Insurance - suffice to say I will probably be travelling more often but shorter haul and shorter duration.

I think that's about it for now.

Friday, September 04, 2009

Hmmm

Well that wasn't what I expected - the first of my pumps raised a lot of interest, some 22 "watchers" a few email but only 4 bids and a sale at £31. I've made a loss :-( However, I said I'd let it run it's course and see what the market valued it at and I guess I've got an answer, although eBay can be unpredictable.
The funniest thing is that the buyer is known to me - I was negotiating a purchase from him! Small world.
This Blog has generated some enquiries and I'm currently putting together a package for the States which will help me break even.
The process has also encouraged a few people to turn up some spares and parts for which I'm very greatful (thanks Mike, that box of stuff will be very useful!) so I'm not put off just yet.

Tuesday, August 25, 2009

Lucas fuel pump resurrection

After much work, head scratching and testing I have built some pumps I'm proud of.Pump1 I enjoyed doing them and have a couple for spares for myself and a lot of potential to make more. I’ve figured out what works and what doesn’t, what can be reused and what needs to be binned and more importantly how to test the results.

Sourcing and buying parts outside of the normal retail outlets has lead to buying in quantity but means that I have the stock to do more.

It also means that I need to recoup some of my outlay so the first "surplus" pump is on ebay now to see if there's a market for these.

I'm never going to make any money at these because there’s too much manual labour involved and the parts aren’t cheap but I hope I can make pumps that work. I’ve selected the best bits, reconditioned and replaced where necessary and tested a lot. I’m going to run each pump for a min of 2 hours on the rig to ensure it doesn’t lose pressure when hot. Whether I put each one on the car and run it remains to be seen, changing a pump is a messy business at the best of times!

So here’s the first one for sale starting at a basic cost price, we’ll see what the market pays.

Lucas Mechanical Injection fuel pump - rebuilt on eBay (end time 04-Sep-09 08:32:32 BST)

I may have been overly cautious with my listing but I don’t want anyone to go thinking they are getting the same product backup as they would get from a fully professional outfit, with guarantees and after sales back up a professional would provide. I have therefore tried to be offer a careful description that doesn’t allow for ambiguity. The pump is the best I can make and it hits the mark in terms of flow and pressure, current draw and performance.

In the meantime, I’m looking for injectors to rebuild, having bought 50 seals and ordered the necessary chemicals to create the right finish on the injector bodies I think I could do them pretty cheaply. Whether it’s pumps or injectors I just need cheap core units to have a go at.

Monday, July 27, 2009

Special Spanners

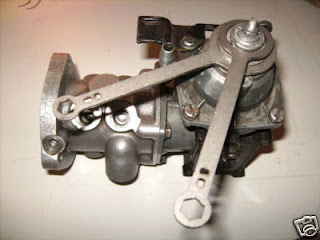
It's always bothered me that I've never seen the "right" tools to adjust a metering unit on a PI. The "Christmas tree" of nuts that adjusts fuelling at various throttle/vac positions is housed under the black or green (or Red) cone on the top of the MU - if you have a red one email me ;-) The nuts are weird different sizes, not conventional at all. I always thought it odd that no original tools ever surface for these nuts.
It's not the end of the world, you can get by easily without them but I always wanted the right tools or at least to know they existed!
Enter a nice chap who goes by the name of Hans-Peter Langenbach from Germany. He had the same idle thought as me but he decided to do something about it. He set about designing and manufacturing a set of suitable spanners.
He popped up on the Club Triumph Forum and asked if anyone was interested, I was and I now have a set. They do just what it says on the tin and fit just fine, might be a little tight but a light easing with a file is all that's needed. I admit I have not yet actually adjusted anything, one thing at a time, I'm still blueprinting, building and testing Lucas pumps! Hans-Peter has had a batch of these spanners made and is now selling on eBay, he needs to recoup his investment as he had to have quite a few made to make it cost effective. Click here for details http://shop.ebay.co.uk/merchant/hplangenbach or email Hans-Peter direct hplangenbach at yahoo dot de. He's a genuine guy and happy to help.

Sunday, July 26, 2009

Feeling righteous

Sunday was the day for Lucas PI remanufacturing. Over the last few months I've been doing some leg work to acquire the right bits and pieces to recondition a pump or two. I've been finding spares all over the place, at last count I was up to something like 7 pumps in my possession plus the one running on the car!

I've tested a few and many were crap - looking decent and serviceable on the outside doesn't mean they're any good at all on the inside. They all run and pump but a leak shaft seal (drips out of the tell tale) means they are useless unless worked on.

My new best mate, the friendly chappy at the local hydraulics place has been a real help - he sourced the big "O" rings that sit between the pump and the motor. It's the same ones in between the layers of the pump body. He also sourced the "O" rings for reconditioning Lucas injectors as I have run out of original Lucas ones. Trouble is, I had to have 50 - well guess who'll be buying up spare injectors and reconditioning them to make some money back?

The pump seals came from Canleys as did a set of brushes - these are the same as wiper motor brushes, same backplate but the wiper uses 3 brushes and the pump motor uses 2 - you can leave one in situ unused or take it off.

Most of the brushes in the pumps I've dismantled are OK, lots of life left in them but I thought I'd have a spare set in case I needed them.

The ultra sonic cleaner has been good, really gets the fine crap off - it's not as good as I'd like but I think I need to get better at rough cleaning first then use the ultrasonic to ensure it's clean for reasembly.

Getting the shaft seals out has so far been the worst job, I've ruined a cheap set of picks I bought - lasted about 5 minutes! So, back to the drawing board - if you can't buy a decent tool, make one. So I heated, bent and filed a screwdriver into a flat ended pick - it was great, did the job in a moment. I'm well pleased - funny how silly little things make you feel achievement!

Some silicon spray helped reassembly, careful not to just push it all together as the sharp end of the armature shaft can cut the new shaft seal rendering it useless.

I spent some time polishing the armature and making sure the segments were clean, that broken pick was useful for that!

Put it all back together and it works. OK it runs, sounds OK and doesn't burst into flames or even smell like burning.

Attention turned to the pump body, it's held together by roll pins and I was a bit worried about how to get it apart. Nick Jones sugested I just hold it in a vice and tap it apart with a soft hammer, I have to admit I was dubious it would as it seemed so solidly held together but it worked without drama. In fact I was able to wiggle it apart with my hands and after a little gentle levering it was apart.

The pump is a gear displacement pump, basically two simple gears running in a 3 layer sandwich. The top layer is the critical one and really the only part you can play with. If there are any scratches or wear in the plate then pump efficiency will be lost. Polishing the plate on a sheet of glass can take out some wear and reduce the gear end float thus regaining efficiency. So I've polished a couple and we'll see if they pump better when they go in the test rig (that I haven't really built yet!)

PRVs seemt to be in short supply, well they don't come up for sale very often, the last couple I've acquired have been attached to pumps or in with other PI kit. No matter, they are simple in operation although do seem to give a little trouble every now and again. I have a few and will select the best in the test rig.

There's lots more to do but now I have dismantled 3 pumps and rebuilt 2 I will turn to the test rig and see if I can set them up to run up to pressure. The next stage is to run them for a prolonged period, say 12 hours and check results.

Wednesday, July 15, 2009

It's weird what pops into your mind.....

I woke up this morning with an idea, well more the idea of a place to look for the solution - complicated I know. Here's the twisted tale. I have an agglometer in the PI, a fancy name for a glass bowl and drain tap in the fuel filter. The idea for this is that you can see if there's any water contamination and drain the fuel. It also has the added benefit of being an easy way to drain off a small amount of fuel for starting a BBQ in true boys own dangerous cookery style - but that's another story :-)

Anyway, as well as the agglometer thingy I have a clear injector line so I can see what's happening there too. The result of all this transparency is that you see things you never knew were happening - phenomena that you'd be blissfully unaware of if you had a standard system.

What could I see?

Bubbles!

No not the one time monkey partner of the deceased King of Pop but bubbles of air/vapour in the glass bowl and the injector pipe. These baffled me - the system was not leaking, it was not cavitating, these were appearing from start up and through out running up to temp (pump temp as well as engine temp). So where were these bubbles coming from? They were worrying as the PI system has no way of bleeding air out once fuel has flowed passed the PRV and then at pressures over about 30 PSI the PRV won't bleed air.

OK so to the point - I woke up this morning and thought "I know where the answer to that is" and I went straight to the article Dave Pearson gave me which emanated from I think a 1990 Club magazine (2000 register maybe?). I had blogged about this in the past. There it was, failing motor shaft seals on the pump unit will allow air in as well as leak fuel out.

Now I have tested loads of pumps and found failed shaft seals on about 60% of them - I haven't looked for air ingress just fuel egress (which is more obvious when bench testing). So it seems highly likely that I can sort this out with new seals.

The article also provides some good advice on blue printing a pump, what and how to modify as well as what to leave well alone!

As I write this, I think I'm going to have to work through this article and do the operations it suggests with camera in one hand and blog in the other.

Whilst the Lucas pump will always be the weakest link I am determined to build a good 'un and run the little bugger to success - I am actually enjoying this.

As soon as work, family and life generally allow me the time in the garage to get some momentum on this I'll be OK.

So far my local hydraulics place have let me down on the parts I ordered but my new best friend Darren at Pirtek Reading is on the case. Today's idle though - I wonder if they can supply injector O rings?

Here's the article, scanned and blogged, I commend it to all PI owners, I just wish I could credit the source properly:-


Jason's Blog: More Lucas PI info - some pearls of wisdom here :-)

Tuesday, July 14, 2009

Tyred and emotional

I'm a hoarder, I can't throw stuff away, it's a serious problem for me and although eBay has relieved me of a few things it's a double edged sword because for every thing I sell I seem to buy more replacements!
Anyway, Sunday was a good day, fellow Triumphist Nick Jones was in need of a hood frame for his Vitesse and yes, I had one, well two actually. They'd been up in the garage loft for a few years - one even had a 1970's white roof still attached. Anyway, an arrangement was made and Nick pitched up Sunday morning for excavations in the garage loft. I uncovered a spare wheel well for a Herald/Vitesse up there too (will be on eBay when I can find the camera). We managed to get the frames down and examined, they weren't as good as I remembered them but together they were good enough for Nick and beer tokens changed hands. Not one to hang around, Nick's already been at them with grinder and hacksaw to make a bespoke but more importantly fitting hood frame for his Vitesse!
Great stuff, my junk is useful after all! The best bit came when I was assessing the storage up in the loft and realised I had a set of decent 13" tyres up there - I think they came off my old Vitesse but I can't really be sure - there was one brand new tyre, one that looked like it could only have done 50 miles and two part worn ones.
Why is this relevant I hear you mumble? Well because outside sat on a flat tyre is my daughter's hateful little Corsa. I had noticed a deflated tyre a few days previously and upon closer examination I wasn't happy with the state of the sidewalls on another of her tyres - it's a 10 year old car and although low mileage it looks to have lived outside all it's life - the tyres were all showing signs of cracking. One was particularly bad.
Anyway, quick check of the sizes and yes, spot on the same as Vitesse tyres - 165/70 x 13 - ideal! So off to my favourite little garage for a quick swap around. It wasn't quite as cheap as I remembered and in the last 12 months their costs for mounting a tyre, new valve and balance has near doubled. Still fifty quid for what is effectively 2 new and 2 nearly new tyres is a bargain - for my daughter - she paid :-)
The big bonus is that I have used some spares, made some space and saved some money. I can also constantly remind her that her beloved Corsa is on "Triumph" tyres.

Turned out nice again :-)

Wednesday, July 01, 2009

Under pressure

The PI piffling continues in the heat - great for vapourising all the spilt fuel just hope no one lights up nearby or it's instant BBQ!


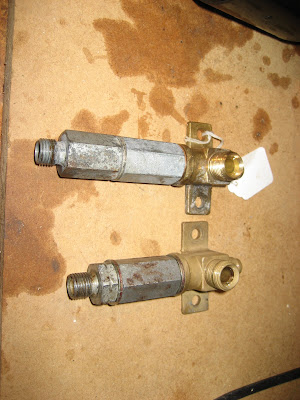
I never knew there were two types of pressure relief valve - the long ones are easily dismantled and examined but the short one is a bit of mystery to me. The brass piece is just a 3 way, the next segment is just a housing for a mesh filter, the actual PRV is in the end. On the short one looks to be very similar to the normal long type but I can't see how to take it apart. Never mind, I'll see if it works and adjusts OK. I'll have to use the car as the test rig as I haven't built a bench test rig yet.

I have now been through my stock of pumps and tested every one on the car. Which one is the best? Well would you believe it, the KMI one that wouldn't run and I took apart and cleaned! All bar one actually pump, 3 have failed shaft seals so they piss fuel out of the tell tale and one just won't hold a constant pressure as it over heats within 5 minutes and screams like 12 year old at a Jonas Brothers gig.

That leaves me with the pump that won't make 106 psi for long enough and the KMI one I "refurbished" as the only serviceable ones out of the whole lot! Proof, if proof were needed, that you can't buy anything decent for less than a tenner - well I guess you could say that the KMI pump cost me fifty quid and came with a load of spares :-)

So, the quest is on for seals and I'll refurb them all (maybe the one with the broken magnet might be last, not sure about that one.)

I started to look into whether I could get some shaft seals, I found them quite easy, it's part number 517419.

Prestige - £8.95

Rimmer's - £10.29

Witor's - £9.95

Canley Classics - £7.35

As far as I can tell all the seals, brushes, "o" rings etc are available, Rimmer's do a kit which appears to contain all you need for just shy of £40.

I think I'll get on the blower tomorrow and see what I can rustle up, I've got 5 pumps to build :-)

Pump it up

I'm Jason and I have a problem.

I buy "bargains", you know the sort of stuff, £0.99 on Fleabay and I'm there, "click" and it's mine!
So, armed with that "skill" I find myself sat in a hotel room in India, with nothing but a mini bar and a laptop. You know the routine, drink, eBay, random clicking, box of busted PI pumps is mine for a fiver, delivered.
So I get home to be greeted by piles (and I mean piles) of various eBay purchases and they get stacked in the garage.
The intention is to learn about the things, figure out what wears, what can be refurbished, what new parts are needed and how to test the finished item.
This week I am on a "use it of lose it" holiday at the end of our holiday year - no one else is off and I can piffle in the garage,
I am now surveying my vast stock of pumps - I've paid no more than a tenner for most of them and the vast majority were less than that. Some came with mounting cradles, pipes, pressure relief valves, filters, etc, etc. I've got a KMI re manufactured unit (interestingly it's got a big sticker on it that says it must be fitted with a cooling coil, it was), one that has been DIY refurbed to an amazing standard (and came with loads of parts thrown in by the seller) but most are just standard second hand pumps.
So I took a couple that didn't seem to work when voltage was applied and started stripping. First off is the pump body to see if that's seized. The KMI one was solid but a little percussive maintenance fixed that and it turned. The KMI motor was filthy inside and so I got my newly acquired ultrasonic cleaner on it - pretty good result. I cleaned it all out and reassembled just to see if it would run again - yup!
Next off was one of the grottier looking pumps, I remembered to take a photo of this one, you can see the kind of thing that greets you inside.

However, it too cleaned up OK and ran when reassembled. This pump will, I fear end up as parts. The shaft seal has gone hard and failed, that means fluid gets passed it and into the motor - it leaks from the tell tale (the brass drain just visible under the base plate in the picture above. It's also noisy and when I looked carefully I could see that one of the curved magnets in the case was broken. A shame really as the rest of it looked OK.

I have some reconditioning instructions somewhere that cover what can be done to the motors to help increase efficiency but as I don't have any sophisticated test kit like a growler I don't think there's much else that can be done.

I need to find a decent supply of seals so I can rework these pumps, I should be able to build quite a few then throw them onto a test rig and run them for 24 hours or so - I have acquired a variable voltage power source to do this. I need to figure out how to put a hydraulic load in the test circuit and sort out the plumbing but it's coming together.

Also in the pile of mail order parcels were things like an electronic pressure gauge, a Moto-lita steering wheel, a rivnut gun, some stainless tubing, some headlight accessories, some pressure gauges, a set of curved sewing needles and piece of ex-Military hardware.

More blogging when I stick another screwdriver in my leg and need to come in for a plaster.

Posted by Picasa

Friday, June 12, 2009

Tacho wiring diagrams

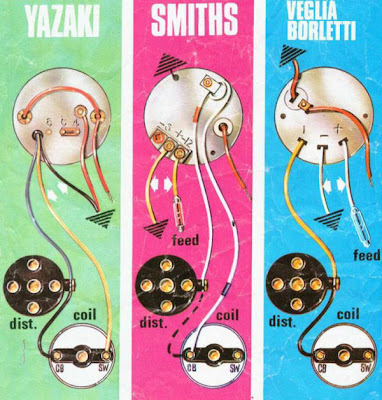
Having been considering a tacho/rev counter for a while now (Mk1 PIs do not have one as standard) I started thinking about what, where and more importantly how I would fit it. I don't want to bodge a hole in the dash, I don't want to cut out existing instruments and I don't want a modern looking tacho. As ever, my eyes turned to eBay and there's a bewildering array of instruments, often without instructions or wiring diagrams. In my quest for information, I stumbled across this and thought it was worth sharing

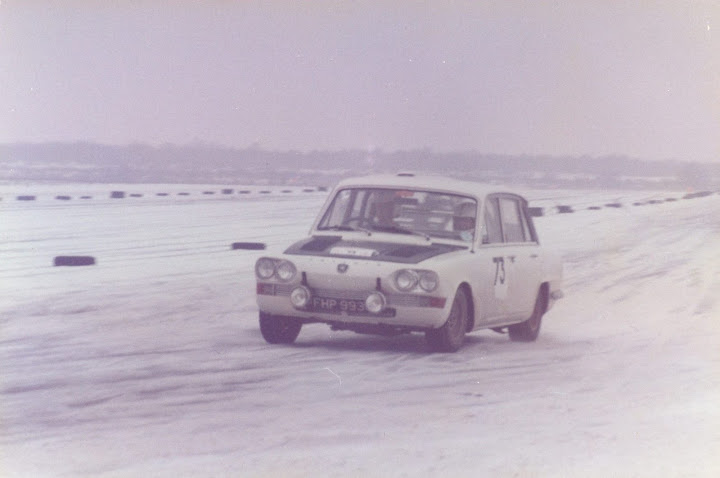
I still haven't got a tacho but I do have a reasonable idea of how to mount it and what sort of tacho would be OK. Ideally I'd like a works type pod like on FHP993C so I can put a fuel pressure gauge up in view but that might be a little tricky to find - my car isn't a replica so I don't have to be a slave to originality but I would like to keep it period looking as far as possible
From FHP993C - At Canley Classics July 2007

Posted by Picasa

Saturday, May 30, 2009

Indian SD1

Have been out and about in the city of Pune and spotted an SD1 in a carpark, didn't have the camera but will try and remember it later today so I can get a picture, if it's still there. SD1's were made in the old Standard India factory in Chennai (aka Madras) where the Standard Herald and Gazel were made. The whole Standard / Leyland India compant went bust in the 80's and lay dormant for years until Rimmers bought up the stock of half assembled SD1 shells.

Anyway, I've got a weekend in Pune and then off to Noida (Delhi) before the long haul home. I hit the ground in the UK on Thursday night then Friday morning it's up to Scotlandshire for the event formerly known as La Carerra Caledonia.

See you there :-)

Monday, May 04, 2009

Back home in one piece

Well we made it home and didn't need the services of a recovery truck so I count that as a successful outing! A straight drive from the docks home, not the easiest but I took it steady and it was fine as long as I didn't expect any acceleration!

Well it wasn't all plain cruising - it's misfiring or to be more accurate, not firing fully, well that's what it feels like. I didn't have any pump cavitation issues and that's the spare pump running without a cooling coil. I'm starting to think "ignition" so I am going to go through it all and assume nothing is right, testing it all one component at a time.

Must find out how to test a coil!

For now it's unpack, wash-up and sensible meal time.

BIG thanks to Graham and Angela and the Isle of Wight Triumph club for another cracking weekend!

Sunday, May 03, 2009

What a day

Well that was a day and a half! The car ran better for a while then started playing up again, not in a good way! The PRV seemed OK but then the pump started to cavitate and scream just after the car stops! It had been running OK, cool and when I checked it was drawing only 4 amps. Today it was up at 5.6 amps and it was cavitating - I could see the bubbles circulating into the glass bowl of the filter - fuel pressure in the engine bay was fluctuating all over the place. The current diagnosis is therefore crap pump!
So being a good boy scout, I had a spare and changed it, that seemed to then show up a bit of dodgy ignition! The rotor arm was changed out for one I actually fixed with araldite once - better but not great
At this point someone handed me a beer and I gave up! The thing (the car gets called a thing when it's not running right) is running, it hasn't actually stranded me. Yet and to be brutally honest I am knackered and looking forward to a few more beers!
So balls to the PI and cheers to the beers!!


Sent from Blackberry.

It's a hat trick!

Despite stiff opposition and the creation of a splinter group "Rejected by the Shirts" when partners decided to make their own team, the Hants & Berks irregulars won the pub quiz for a third year running. Wearing the same awful shirts as last year and christened the Matalan Marvels because of them, we managed to retain our winning streak. Quite how still amazes me as we were only 7 and were fairly drunk but just as stupid as we always are.
Last year's prize money was recycled into a Sat Nav which we have donated at this year's raffle prize to keep the weekend interesting :-)
At the moment I am contemplating getting the BBQ lit to start breakfast for 11 - I do hope the rain we had in the night doesn't come back!

Sent from Blackberry.

Saturday, May 02, 2009

What a relief!

Well that was fun, the PI continued to fart and pop it's way round the island today but we did make it to Blackgang Chine and back. During the day a diagnosis of sticky PRV seemed favourite amongst the gathered Triumph intelligenci. Although I had a spare in my kit I was not sure of it's suitability. I mean it could be worse than the one on there! Fortunately for me organiser of the weekend Graham Stretch came to the rescue again as he so often does! He had a known good PRV on the shelf. After showing me how it worked (because I wasn't sure and it was in pieces) I fitted it and immediately got a steadier pressure reading and a smoother running/sounding car. A quick blast down the road and all seemed much better.
I will do a post mortem on the old PRV and we'll see what the issue was. The car is running quite rich but once I've got it stable I'll get onto that.
For now it's on with the tasteless and tight shirt for an evening Pub quiz and some beer.
Oh and Richard, I did manage to help Alison, it was the overdrive switch and although I didn't have a spare I did have some araldite to lend for her and Mark Bland to fix the old one :-)


Sent from Blackberry.

Friday, May 01, 2009

Installed

Well we made it without issue, a couple of chugs and nothing more dramatic but it's still not right :-( Anyway, I am installed in the bar, there is Spitfire Ale on tap so all is well with the world. I will have a look at things in the morning and assess whether it's worth messing about or just a prayer to the gods of self healing!

Sent from Blackberry.

Isle of Wight here we come

Not sure if this will work as I am using a bit of company bandwidth. Have arrived at the ferry ahead of schedule only to konk out at the check in! A quick look at my pressure gauge showed a distinct lack of PSI - like nowt!
Pump buried under camping gear but I left some room around it (the boot is currently bare of any trim). It was not hot nor even warm to the touch so I wonder if the PRV is playing up? They apparently don't go wrong often. I have a spare with me, as you do. If it is heat in the pump then it will have cooled by the time we get off this ferry. I wonder if I may have squashed a fuel line with all the stuff packed in the boot?
Plenty of time to investigate if/when we get to the camp site.
I have heard from the advance party (Carl) that my tent is up :-) He has also called for fresh supplies of beer so we will stop off on the way and pick some up.
Right, enough of this mobile blogging, back to enjoying the Isle of Wight ferry!

Sent from Blackberry.

Wednesday, April 29, 2009

La Carerra Caledonia

Well what an interesting couple of days. I had to go to Manchester on business for a meeting today so I drove up last night and stopped off to see Dave at Canley Classics. I often drop in for a pint and a chat (OK usually a pint of coke).

I had considered entering and mentioned it to Dave but it was somewhat half hearted as I knew I would have no time to prapare or help prepare a car and mine hasn't really proved itself yet.

Anyway Dave said he'd been visited by Dave Langrick who had convinced him that doing La Carerra was a good idea - we'd done the event together 2 years ago in my fire breathing Vitesse (the flames out the back had scorched Langricks bumper) and it had been fun despite the issues.

Anyway, Dave asked if I wanted "in", well I had already decided that I could not do it in my own car, due to the lack of any preparation time. I'm due out to India again in a few weeks and won't be back until Thursday evening on the 4th but hey! If there's a drive in it and Dave's prepared to do the hard work then yes I'm in!

So Dave's doing the entry, I'm sorting the accomodation and the deal is done!

What car? Well maybe the new Atlas V8 Sport Touring? Or maybe not. He won't tell me but who cares, a weekend away with Triumphs and the Scotlandshire countryside will be just fine.

First issue though is finding somewher to stay on the Friday night as the Old Stome Trough is apparently full! Major issue as we do like to have a drink or two. Sleeping bag in the car or maybe a tent in the field? I'll have to ask around but if anyone doesn't mind a couple of house trained semi-drunk blokes snoring for a night then let me know, if you're going to the OST and can give us a lift that would be a bonus (well if you don't ask...) We've got B&B money to spend.

Saturday, April 25, 2009

Unstuck stickiness

Well that's me done for the day, my back's gone stiff and it's time for a shower and a beer. It's been a decent day really, the sticky brake is unstuck. I couldn't really see much in the way of a cause but there was quite a lot of dust and crud in there. I've cleaned it all up and made sure there's no rust on the drum or lumps on the shoes. To be honest it just looks like they were sticking to the drums, everything now looks fine. It's all pretty new looking in there, all NOS stuff.
I also managed to get blanking plugs into all the holes in the nearside inner wheel well. Throughout it's life the car looks like it's had several incarnations of PI plumbing. That's not uncommon seeing as there were half a dozen factory modifications done to Mk1 PIs! I've gone and done my own version relocating the pump to the offside, away from the exhaust. I've plumbed in a fuel tap and glass bowled agglomerater with a drain. That drain goes down through the boot floor so changing the filter should now be easy and involve turning the tap off, draining the filter through to the outside. The filter housing is now plumbed in with flexible hoses so it can be unbolted and manoeuvred easily. I still need to do something with the boot boards to tidy it all up, especially as I have pulled out all the grotty boot carpet (have kept it for patterns). I am still looking for some shadow blue carpet so I can make it all pretty and neat.

Stabilisers back on

Well stabiliser (single).

Ever since getting the car the dashboard has been a weird ornament. None of the instruments worked. I had a low fuel warning light but that was about it.
First came the choke light, that was just a clear up of the mechanism and I did that when I found the right choke cable to fit.
Next came the clock, thanks to Scrapman Colin Wake I got a working clock - it even kept excellent time.
Next came the speedo, that was my fault I think, when I fitted the cable I seem to have managed to miss align it at the gearbox, quite how I did it I don't know but a happy few days tracing it sorted out and that was great.
But the fuel and temp gauge eluded me - I got a new voltage stabiliser but that didn't work, it was more serious than that. I managed to buy one of those new solid state stabiliser chips (no connectors just the chip) and was prepared to "go modern" to fix it. First though lets get the multimeter out and see what the hell's going on. Yup, it's all over everywhere. Neither stabiliser (original or new) was producing the required stable output, even running a direct feed for the earth off the battery didn't do it.
So, nothing for it but to get the soldering iron out and have a play. 30 mins later I had soldered up some wires onto the tiny chip and it was all connected - it works! Frankly I am amazed, I'm crap at electrics, my eyesight is going so fine work is a challenge and my soldering has always been more expressionist art than electronics.
So, what's left on the job list - bloody loads!
I have now renewed 3 of the injector seals as another injector failed today. The ones that have failed were yellow plated, the ones that have not are plain - no idea if that's the cause but it does seem likely. I have one plated injector left but it was the first one to fail and I have replaced the seal in it - I have no more decent spares to use. I'll get another set of seals and the clean up my spares, I might just swap out that plated one anyway.
Next on the list is to investigate a sticky rear brake. I don't tend to leave the handbrake applied on the car when it's in the garage so I can roll the car about but just lately it's been very hard to push. I found the same just before and at the MOT test but the brake efficiency was fine. I suspect a strip and clean will sort it but we'll see, nothing is ever that easy!

Friday, April 24, 2009

I've seen the light

I've always been keen to use modern technology to improve the lighting on my cars, I don't think I've ever had standard lighting for long on a car. Usually that's been fitting relays and higher wattage lamps.
There's never been much choice for upgrading the sidelights so I was quite interested when I started seeing LED lamps coming down in price.
I also liked the look of those modern LED indicators that are crisp and instant as they come on.
For nearly a year now I have had an HID kit sat on the shelf waiting for me to get round to fitting it, I don't have all the lenses I want to do that yet.
So last week, in a moment of weakness and I dare say idleness, I took a surf and ended up with a set of LED lights. Somehow I managed to mess up the order and ended up with a bit of an odd assortment - I didn't want to do the indicators until I had figured out how to ensure they actually work! LED indicators and old school flasher units don't play well together, apparently the LEDs are such low resistance that they don't work properly with those old flasher units. The fix seemed to be wiring in resistors but that just feels like a fudge. I have now found a purpose designed LED flasher so I will try that at a later date.
Anyway, back to the LEDs. I had sidelights, stop/tail, some reversing lights (or indicators) and some festoons - that's where I messed up! The festoons were for the indicators on the B posts and one for the interior light, well the festoons are the wrong size for the interior light and of course the indicators don't work (Duh, I knew that so why did I order then this time!?!)
Brain fade!!

Right, so I tried the sidelights in the front to see what they were like. You know, I'm not entirely sure! I mean I like the "look" bit I'm unconvinced they are actually brighter (as these are supposed to be) but I do like the crisp light. It's quite hard to take photos of lights but here you go.

From Jason's Blog


Here's a closer look at the LED side

From Jason's Blog


and the other side with a filament lamp in it

From Jason's Blog


Here's the end result

From Jason's Blog


Here are the rears, first the reversing lights as standard

From Jason's Blog


and now with an LED

From Jason's Blog


This is the one that's quite hard to photograph, here are the rear sidelights as standard with a filament lamp in it,

From Jason's Blog


and now with an LED in it, I'm not convinced this is an improvement but from some angles it is

From Jason's Blog

Tuesday, April 14, 2009

Sometimes the Gods smile on you.....

....and sometimes they turn round and take a dump on you.

So, it goes like this - MOT passed, feeling good. I'm sorting out the rough running (I'm running out of ideas but I'm still keen). I refit the air filter, it's all a little tight with the "spaced" throttle but it just about fits.

Now let's see if the timing is still OK. I find that the timing is a little off, weird because I've done that a few days ago. Never mind, get the timing gun out and get it sorted, dizzy feels a little loose so I tighten it all up.

The car's ticking over nicely and then just stops, dead. No stutter just stops. I jump in the driver's seat and whiz it over, it doesn't catch. Strange.

Then I get that flash of inspiration or was it the sound of the pump changing ever so slightly or the stench of petrol? So with ignition still on (silly boy) I take a look in the open boot - it's not a good sight. The high pressure hose on the output side has split where it goes into the fitting - it's just old and had it's time.

You see the thing with a PI is that any "leak" on the high pressure side is not really a "leak", it's a Tsunami. So the boot is awash with petrol.

Damn!

Unfortunately petrol attacks the stone chip paint under the colour and therefore in no time we're down to bare metal!

But every Tsunami has a cleaning effect, stripping away the old so the new can be built. I've ripped it all out and replaced the broken pipe, got it running and driven it into the garage. Tomorrow I will plan the relocation of the pump, PRV and filter. I may even sort out those boot boards I've got and tidy the whole lot up.

Before all this happened I also did something I have been threatening to do for a while. I stripped and "reconditioned" and injector. Dave P gave me a new seal about a year ago, it's a tiny "O" ring, it was an original Lucas one. The procedure is really simple, so simple I am bound to have screwed it up! There's an external circlip at the squirty end that you can remove with a small flat blade screwdriver. Then you can push the guts of the injector back through the input end, I used a brass drift to push it all the way.

From there you can see the guts of the injector and the O ring, fiddle that off and refit a new one, trying not to upset any of the rotating stuff - looks to me like you can twist things and set the trigger pressure - I left well alone. Reassembly was the reverse but I used a little light oil to ease the new seal back through the injector body. After refitting the C clip all was ready to whack it back in the car.

Guess what?

It only bloody worked - really good fine cone spray, no drips, no bubbles, fires at the right time - I am amazed.

And before everyone says "Oh but you need to set the trigger pressure correctly" - I know, I haven't and I don't know how to measure it so I'm not saying reconditioning your injectors is as easy as I have described because there is more to it. I feel that test rig is getting closer to being built.

From the guts of the injector I can't see a huge amount to go wrong, Dave P's been telling me for years they are simple and just to prove I do listen to you Dave - you're right, again :-)

Whooo Hoooo!

It's that feeling you get when you win the lottery, when you find one more chip in the bottom of the bag, when you come home and the kids haven't broken anything, when, when , when - you get the drift.


Well that feeling was mine today when the PI sailed through the MOT without a problem. The guys in my preferred MOT station are old car friendly, Bob the one I see more often than not, appreciates the finer things in life, like Triumphs :-) OK so whe I said "it's running a bit rought I've got a dodgy injector" he did say that they were standard on PIs - thats' why he always ripped it all off and put Webers on!


Nevertheless, a fresh ticket is mine. The car made it there and back - I have even managed to get the speedo to work, bonus!


So, to celebrate, I gave her a present


The issues now are all around getting her running right, anything else is pretty much cosmetic tarting - I have promised myself that I will attend to the important stuff first. Otherwise I'm going to have a pretty car that won't go :-(

Thanks Bert

I've been struggling with the PI, I think I've turned the corner thanks to Albert Einstein. You see I have a "Home Page" on my PC that includes a daily random Einstein Quote, I'm trying to increase my bullshitting repertoire. Anyway, today's quote was

'Insanity: doing the same thing over and over again and expecting different results.'

and as I sat there looking for inspiration this morning I figured that was good advice. Let's go do something different!

You see I couldn't understand the results I was getting with the fuel injection - bubbles in the now clear line (sometime you can have too much information) and poorly injecting on No1. All unions tight, no sign of leaks, everything all as it should be visually. I had changed out several components and generally messed about with the usual suspects. All my test readings on my pressure gauge were OK but it would still not run well, popping and farting like me after a curry and bucket of lager.

I decided to see what would happen if I exceeded 106 PSI at the metering unit and went up to an indicated 120, the racers do it, so why not?

Bingo! Bubbles cleared in the line. The injector was still not right but better, I swapped it for No2 which was fine, that told me the injector was faulty. I rummaged in my spares and found a better one, not great but better. She runs without the popping and stuttering, seem far happier at idle and is worthy of a road test, or two :-)

I will take stock of what I have and see if I can sort out a recon injector, I don't want to run with this one for long. I have some seals somewhere to put in an injector but I haven't yet figured out how to test the trigger pressure. There's not much too them but I am guessing that they all need to trigger within a reasonable pressure range of each other. The book says 60 PSI I think.

That leads me to another idea to make up a test rig and pressure test some of this kit I have lying around. I've got loads and some of the pumps look great but there's no point in keeping useless spares and there's no way of knowing if they are crap until you pressure test them!

This episode today has encouraged me to sort out the plumbing in the boot of the PI, I fancy putting the pump over on the driver's side, away from the heat of the exhaust. I'll also put a fuel tap in there so changing the fuel filter isn't such a messy job! I'm also told that Mk2 plumbing style is better with the pump on it's side, I have the necessary cradle and cooling coil combo on there at the moment as a temp set-up. The pump is NOS. I now have a glass bowl filter so I think I'll put that in the OS wing and modify the trim around it all.

Anyway, that's the midday update, MOT this afternoon so now my dear daughter has shown her worth and provided me with a bacon sandwich, I can get back to the car :-)

Monday, April 06, 2009

A few more silly little jobs done

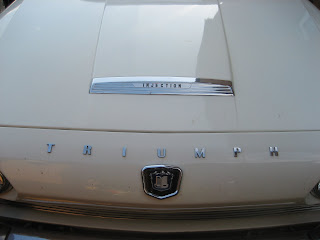
When I bought the car it came with a nicely rechromed bonnet badge, these things are getting to be silly money, £100 for a decent one, £200 for NOS.

Anyhoo - mine was nicely rechromed with a new foil for the Injection lettering, however it wasn't quite right as the indents weren't black. So I decided to try something and took a roll of go faster striping I had and a craft knife - here are the before and after pictures


Hopefully it'll stay on, I've had that reel of stripes for about 30 years! I remember nicking it from my Dad's garage and using it to put some on my mates Raleigh Chopper when we were about 10 years old!
The other major achievement today is that the proper steering wheel is back on and.....


...... I'm not so sure I like it!
Too thin, too flimsy and too big! With PAS I don't need a bus wheel and I may well find a smaller Motolita one - if I can find one for a reasonable price.
More later, I'm enjoying this :-)

Saturday, April 04, 2009

Today's learning......

There two ways to remove a steering wheel, one way is to leave the nut on but loosly so the wheel just comes un-stuck and doesn't actually come off the column - ie you can undo the nut completely after you've loosened the wheel on the colum and are left with the steering wheel in your hands and a smile on your face.
The other way involves you removing the central nut and sitting in the driving seat. You pull on the wheel whilst bending your head over the steering wheel. Now give it a few repeated tugs culminating in one big snatch. The wheel will now fly off the steering column and you will whack yourself on your head with the wheel. Bearing in mind you have just put a lot of energy and ooomph into this it will hurt, you will see stars and if you're really luck you will have a nice red mark on your forehead, a small lump and a big headache.

Guess which method I used?

Remember kids, I do these stupid things so you don't have to.

Tomorrow I am going to play with electrics, watch out for burnt fingers, blown fuses and appliances doing weird things that you don't expect!

I have redeemed myself

Got the PI back together and took her for a blast down the road, well more of a pootle than a blast!
Never mind, it runs and I can now get stuck into MOT preparation, well checking really because she's been nowhere in the last 12 months.
A couple of corroded connections got in the way of the passenger side repeater working, but that's sorted in a second, just need to do a little repair on the lens to ensure it lasts another 40 years.
I returned wo the orginal pump and have noticed that the fuel pressure is falling under 100 psi so I will change that all out this week - must try and see if I can relocate it to the other side of the boot, away from the exhaust.
I picked up a pair of black Stag seats for pennies last week, they need work - diaphrams etc but they may do for a trial fit - I like them, just need blue covers!

Saturday, March 28, 2009

Forgive me for I have sinned

Forgive me for I have sinned

It's been 5 months since I last drove my PI

I know, I know - I've been busy in the country and others!

Grab a coffee, this is a going to be a long one.

When I last drove the PI, it was missing and would not pick up very well when you floored it - to be honest it's a new engine, the car had been off the road for 30 years and in the workshop for 5 (ish) so I was taking it steady but now it was time to fix it.

I found the throttle spindles were worn and decided to change them for a mint Mk2 set I had.

I then checked for injector dribble (it's an age thing) and sure enough I had a dribbley injector (No1) I took it off and found a couple of little black rubber bits in it - ah-ha says I in my best mechanic voice, Thar's yer problem.

Fortunately no one was looking and I carried on as if I were sane - the black bits looked like the rubber seals in the metering unit breaking down - I remember Dave telling me that the PI kit was "picked over" and fitted to get the car running, it could need attention he said (this car was finished on a budget for the previous owner and whilst some stuff was top of the line, I think he'd run out of money/interest/parts by this time).

Anyway I digress. I cleaned out the lines and decided to fit a good and known metering unit from my stash. With all that done I then ran out of time and went to India.

The winter came and I am a light weight, the car sat until a few weeks ago when it started to get warmer and I went back to finish the job, I never managed it but at least I got to a point where it was just a case of bleeding through the system and firing it up! Yeah right.

So the first thing I do today, within 10 mins of getting in the garage, is to slip with a spanner and break No 1 injector pipe. I admit, I swore.

A lot.

Birds left the trees and small animals retreated to their burrows.

My neighbour, a nice doctor came round to see if I needed an ambulance.

OK time to make a new pipe, I have some clear pipe that's suitable (it's commercial vehicle airline hose). To fit the ends you need to make a tool, the manual tells you to use unobtainium, a sort of nylon like material, to make a clamp. Well what fun I have had! Three attempts and the Mk 3 clamp worked OK
Mk1 was a bit of an HT lead clamp, never made it past the prototype phase
Mk2 was the nylon arm that connects your toilet flush handle to the plunger inside - tried a few times with this but it didn't clamp enough.
Mk3 was a bit of wood, made in 3 mins and worked perfect first time out!

I now have one clear line and 5 black ones but I'm not going to mess with the rest until I figure out why I only have 85/90 psi at the metering unit and insufficient pressure at the injectors to trigger them! The should blow at 60 psi so this is looking bad.

I changed the pump (because it was easy and I have a couple of NOS ones) and I am now attacking the PRV but I don't think I have a known good one to play with - the one on the car should be good but who really knows.

I honestly don't know how the PRV works, I mean I know what it does and I have a reasonable idea of how it does it but I like to understand. Why would a PRV fail and why would it go from 106 psi to 90psi. Adjusting these things is a pain in the posterior because you have to partially dismantle it to do it then of course you have to put it back together to test!

Anyone got any experience with Prestige's modern PRV?

Friday, March 27, 2009

Wow – not only pictures but moving pictures of BYE377H, aka Car No 1 at the start of the World Cup Rally

On the advice of one the discussion boards I visit, I took a long overdue look at British Pathe Limited and found some interesting stuff.

The search engine takes a little getting used to, the previews are low quality and the full versions are expensive but you can get a preview for free.

All sorts of stuff there including this one

https://www.britishpathe.com/thumbnails.php?id=85444&searchword=world%20cup%20rally&searchword=world%20cup%20rally

You can download stills from the movies and I was going to put a few up here as I figured no one would mind. Wrong - I enquired and got a nice email saying that they'd charge me so you'll just have to go there and download them yourselves.
There's stills of BYE377H the 2.5PI of Buchanan-Michaelson sporting Rally Number 1. I never realised it had a red stripe over the bonnet - until Dave rubbed the paintwork off and showed me, then I found these pictures, that I can't show you!
There is a very brief clip of the car driving past and here it is with that red stripe over the boot and rear wings as well!
No sound and the whole thing is silent and only 6 mins long, so far I can't find any more footage - £500 to show you the full thing and £25 a still

Saturday, February 14, 2009

A very productive couple of days

I'll write this up properly as soon as I have the time but here's a quick taster of what I've been up to.

Brian Englefield, one of the privateers on the World Cup appeared on the Atlas forum I occasionally use, then popped up on the CT forum to set a few things right. I started corresponding with him and he invited me to go see him and his "box of World Cup stuff" - was I excited? Damn right I was!

The unique things about Brian Englefield is that not only did he complete in a Triumph but he also bought 2 of the World Cup cars from the works, including the wreck of XJB304H which is now in the hands of Pat Walker. Now there has been some chat about the provenance of this car although having seen BYE377H the Buchanan-Michaelson car and WRX902H the test car, I now know exactly what would be needed to replicate a works shell and how difficult it would be to do now. So it was a great opportunity to speak to the guy who reshelled 404 and see just what was done.
So I gathered up Dave Pearson who owns DYE and has WRX in the workshop and is a fellow anorak. He's a damn sight more knowledgeable on the technical details than I am too!

Now Brian lives in Normandy, an 800 mile round trip for me, add a couple of hundred on that for Dave but what the hell! It's an opportunity to speak with someone who was there, hand his hands in a works engine and drove, broke, fixed the cars!

Because I am off to India for 3 weeks and weekends are precious for Dave we figured out that there was really only a couple of days that were viable to go, Brian would put us up and so at stupid o'clock on the 12th we were off for Dover.

We weren't disappointed, Brian and Jeanette were excellent hosts, Brian's memory, despite his apologies, is excellent and his "box of memories" is more World Cup stuff than I've ever seen before. Add to that the post World Cup stuff and you've got a gold mine. We enjoyed a great evening and morning which passed far too quickly before we had to get back for the ferry.

Here's a couple of pictures of XJB304H, as reshelled by Brian and competing the same year as the World Cup - as he said, it was an easy job to build up the shell evidenced by the following a matter of months after he bought the cars

From World Cup Rally 1970


and in colour, after christening the new car with a minor contact with the scenery

From World Cup Rally 1970


We came away with a hundred scanned documents a couple of photos and a book of notes. I have to decide what to do with them all now!

The first thing I want to do is to make a hit list of people to talk to and near the top of the list today is the Abingdon test driver, Fast Eddie Burnell - where are you Eddie? Also, Brian is going to contact his navigator and see if we can make contact.

Sunday, February 08, 2009

World Cup Rally route on Google maps

I've been playing with Google Maps to see if I could plot the rally route, I didn't quite manage what I wanted to do but I have managed to plot all the major aiming points, well those I could find! I wanted to try and link them up with the likely roads but I couldn't seem to make it work without a lot of work.

Ultimately, if I can, I'd like to tag the photos I have with the places they were taken, once I've verified them!

The maps are reproduced below, I think this should link you to them too


European leg


View Larger Map

South American leg


View Larger Map

If you're viewing this from within the Club Triumph site then you may not be able to see the embedded Google map, click here to go to my Blog http://chinn.blogspot.com/

Monday, February 02, 2009

ADU 5B @ Chatsworth Rally Show 2008

Trawling for photos, I stumbled across what I think is Dave Pearson pootling about on a sedate drive around Chatsworth in 2008, I say "I think" because I'm not sure if anyone else drove 5B that day - Dave, help me out with a comment mate.

Click on each of the images to be taken to the owners pages and the image source with some bigger versions.


Here he is again


Sunday, February 01, 2009

New photo I've never seen before


1970 World Cup Rally 00
Originally uploaded by Paul Lowry

Just mooching around the net for some info and found this phot I've not seen before. All three surviving works Triumphs are in there. Click on the image for a slightly bigger version hosted on Paul Lowry's pages. I've written to him, I wonder if he has anymore?

The caption says

SANTIAGO, Chile, May 13 (UPI) The 43 surviving crews in the London-to-Mexico City World Cup auto rally rested today after their grueling 3,800-mile nonstop drive from Rio de Janeiro

Additional - I have now got the original image and it's a scanned negative at excellent resolution so I've uploaded it to my Picasa album here.

From World Cup Rally 1970

Saturday, January 31, 2009

Triumph Rally cars - long after the World Cup Rally

Via the Atlas Bulletin Board I was pointed at another Picasa album that shows a few interesting pictures including an ex-works World Cup car, an ex-works Mk1 and of all things a rally Stag!!
The pictures were taken in 1985 at RAF Lindholme
I've added the albums owner as a"favourite" in my public Picasa profile.


World Cup Video

Found this whilst trawling the net, again.

Triumph 2.5Pi World Cup Rally 1970

New Album - what does the web think?

I've been playing about with the new improved Picasa, a really good free photo program. I've uploaded a few Mk1 pictures here
I'm a little dispaoointed that no one has yet made any comments on the photos - I welcome people's sensible input here, if you know when or where the photo was taken or can answer any of the questions I've asked (or set me right where I've got it wrong) then please have a go!

From 2000 Mk1 Rally Cars

Sunday, January 25, 2009

More World Cup photos

Considering I only had one picture of this car I am really pleased to have made contact with one of the guys who drove it on the World Cup rally, Brian Englefield. He's very kindly sent me a few photos of the car on the event and in subsequent campagns.
Here's UKV701H the LHD entry of Brian Englefield, Keith Baker and Andrew Lloyd-Hirst, somewhere in Serbia I think
From World Cup Rally 1970

I've uploaded a few more and will blog them as I get round to it or take a look at my newly created (so it will probably fall over) World Cup Rally gallery on Picassa - click on the photo above and go there. I've included a randon World Cup photo in my Blog homepage for those who get here via the web at large rather than via Club Triumph.
Where possible I will always credit the source of the photos - this one was from a professional Rally photographer, sadly the firm seems to be defunct now as I can't find them. If anyone knows better please let me know.

Sunday, January 18, 2009

Quick Restoration Project?


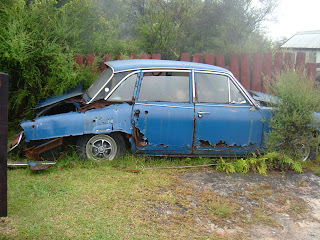
I was transferring some photos from my father's old laptop to a CD for him when I happened across this fine example of a New Zealand Triumph. Photo taken in 2004, not sure of location but near some hot springs if that makes any sense to anyone.


Despite the loss of what looks like a PI, I kinda like the way it's going back to nature.

Saturday, January 17, 2009

Having a bit of a World Cup day

A spark from the Club Triumph forum, a chat with an present owner of one of the cars and an email from an entrant to the event have all rekindled my interest. I've been looking for pictures and details of a couple of cars from the event, the sort of works car BYE377H or "Car No 1" (as it lost it's registration over the last 39 years) and the private "works assisted" entry UKV701H that I always thought was left in South America.

Well the web works in mysterious ways and what does it throw up today but pictures of both cars as well as other info.

Here's a picture I've seen before but only in poor quality, this one isn't great but it's better. It's Bobby Buchanan-Michelson getting a speeding ticket whilst driving out of London from the start in BYE377H - there are more pictures of this event as it was reported in the newspapers pretty extensively at the time (apparenly, I mean I was 4 at the time!).

Then there was this picture, which again I've seen before. It's of entry number 39, UKV701H, Andrew Lloyd-Hirst, Brian Englefield and I think K Baker. Now this was a car I though was left in S. America after an accident somewhere near Montevideo but it turns out the car was repatriated via a roundabout route. It seems likely it's lost now but anyway, here it is, on full chat