Monday, November 10, 2008

Another India trip draws to a close.

I am sat in Delhi airport using fruit based technology to scribble a few words, not because I have much to say, mainly because I can!
It's times like these I wonder why I do this job, it's gone midnight, the plane is delayed and I have just watched some Russian bloke cut his toe nails, in the departure "lounge". I am also knackered.
It's been a hectic trip with much eating and drinking in the evenings to keep the relationships fresh, it's fun the first time, then it gets samey, then it gets a little tiring but overall I do still enjoy the place and the people.
No Triumphs spotted this trip, the nearest I got was what I thought were. once a couple of Leyland 20's parked up and rotting in Pune. I say "I think" because I never actually got close enough to tell for sure!
I did see Indian ingenuity at it's peak though, imagine the scene - scorching hot day at the petrol station. Big queue of bikes (there are more bikes in Pune than cars) and there is a power cut so no fuel can be pumped. No problem for the "whatever it takes" Indians, what you do is you get a bucket and you drain petrol from the waiting tanker, into you bucket and slosh it into the waiting bikes. You can see the evaporating fuel haze and smell the petrol from the other side of the street - truly they are mentalists.
The rest of the trip has been uneventful the usual internal flights through gut wrenching turbulence, lairy taxi rides in free for all traffic, cheap booze by the gallon and a credit card hammered to within an inch of its life.
I did have a good night out with the lads in the office in Pune, at their "liquor den". A rough and ready place where, when you order a rum and coke you get a bottle of "Old Monk" and a bottle of "thumbs up", the local cola. It's all very Indian but despite the relaxed closing - "it closes when we stop drinking" I had a decent evening / early morning with no too much hangover. As a bonus I actually got home OK despite the fact that everyone on the road at that time was drunk, including the cops!
Well the Russian guy has gone to board the Moscow or Kiev flight and has been replaced by a rather nice looking Spanish girl in the daftest MC Hammer baggy trousers. Still, at least she has kept her toe nails to herself and not clipped them onto the floor like comrade Slobo.
Time for a coffee and some more people watching or I will fall asleep right here - not a good idea!
Home in half a day, can't wait.


J

Sunday, September 28, 2008

Follow the intrepid Team Atlast around Britain

Just click to go to the RBRR message diary where all the teams' progress will be reported in text messages, emails and possibly pictures too.

The Vantastic team number 13, aka Team Atlast will be updating regularly, well at least until we fall over :-)

All the team's who gave me their mobile phone numbers have been registered and their messages will show up with their team names and numbers. Each team was emailed this morning with instructions on how it works. Please don't ask Keith and I to troubleshoot any problems over the weekend, neither of us will have the time nor the equipment to do much sorry.

Also, if you want to follow us around on the map then click to http://www.gingell.com/triumph/rbrr/ and courtesy of Craig Gingell and Google maps you can see where we are going to be at what approximate time. All stops will be pretty easy to find and there will be Club Triumph banners, signs and marshalls around. If you're looking for a particular car then ask the marshalls and they will be able to give you an idea of whether the car has been through, is running late or has retired.

Sunday, September 21, 2008

The 5 minute job turns into a nightmare

What a silly thing to get stuck on. I thought I'd fit the stainless steel sill finishers onto the PI, easy enough, although the car came without the trim I had found a good pair on eBay and Chris Witor does the special fixing buttons and pop rivets so I'd bought some of those. All the holes were already drilled and basically the job was - pop rivet the new buttons on and then attach the trim.
I expected to have to bang the trim on with the palm of my hand, OK maybe a soft faced hammer. Well, what a pain it's proved to be! The trim buttons have to be a tight git but the angles involved make it so tricky to get the trim lined up, added to the fact that if you don't do it right you risk bending the back of the trim and then it will never go on properly. I had to space out one button with a small stainless washer behind it, just to allow the trim to get a grip. One side is on, the passenger side is in progress now - I came in to swear at the kids.
I am going to have to space a few of these buttons but you only really find that out after you've fitted them so then you have to drill out the rivets - not easy when they spin as they are all well drenched in waxoil! Grrrr and what I'm really annoyed about was that this isn't actually a priority job at all but now one side is on I must finish the other!

Saturday, August 30, 2008

This week I have been mining my garage for treasures!

A lifetime of Triumph ownership has left me with a load of odds and ends in the garage, some of which I really can't see me needing anytime soon. None of it is especially desirable or rare, in fact there's a strong desire to bin some of it but I just can't bring myself to without trying to move it on to some other needy owner. There's new repro stuff never got round to fitting and lots of secondhand bits that need to sell on. I'll eBay is over the next few weeks but if anyone wants some of this then shout now. From today's ferkulling I've found the following
  • One old repro outer door weather strip for a Herald, the type that were pre-cut. There's also one of the new ones that isn't pre-cut around the quarter light. These come complete with the clips AND the tool to install them!
  • A pair of NOS in Lucas boxes front sidelight/indicator glass lenses complete with new rubber gaskets
  • A handbrake cable fitting kit and cable, all new
  • Vitesse glove box lid, lock and fittings
  • A Vitesse water pump housing (and pump) tastefully painted white! All looks OK considering I took them apart, painted them and boxed them up 20 years ago (the newspaper date is 1998!) In the same box were
  • A Vitesse ashtray
  • Master cylinder mounts cleaned and painted black
  • Clutch and brake pedal assemblies complete, all cleaned and painted black
  • Then there's the bigger stuff like
  • Vitesse front vertical links and trunnions (sold)
  • A servo - I think it came off a Vitesse
  • A couple of re-skinned Herald/Vitesse doors
  • Vitesse boot lid
  • If I can dig them out there's a couple of hood frames for Heralds in the roof
There's more and I'll take some photos but if anyone reading this is looking for something for a Herald/Vitesse maybe some Spitfire stuff - let me know :-) I need the space and the cash!

Sunday, August 24, 2008

Standard Atlas moves under it's own power


Yes it moves, with both forward and backward motion, maybe even a little braking in between. This is the better of the two Atli vans Dave has, the camper is, shall we say, more challenged than this one. I think this may well be the RBRR steed - we must be mentalists.


Here's a pic I like too, one man at peace in his van


Sunday, August 17, 2008

Idle moments

I'm just off to Penzance for a few days to see some friends then I'm back for a week and a bit of DIY jobs around the house plus, I hop, some work on the PI.
You see whilst sat in hotel rooms with nothing but eBay for company has seen me hoovering up some Mk1 stuff. The car really wants very little but there are a few things that bug me and, as is the case when you have time on your hands, those little things have become big in my mind. Enter eBay - to replace a slightly cracked indicator lense I've managed to find a whole sidelight and indicator unit, NOS. In doing so I also found a NOS rear that was too cheap to pass. Although my choke cable buying has reached OCD levels I've never quite managed to get exactly the right knob - well I have now :-) a NOS cable with correct detachable knob is mine - but they are a bitch to fit onto the metering unit - I think I'm just gonna bite the bullet and pull the metering unit this time, far easier!
I need to refit the PI steering wheel and boss and then attend to all the other jobs that remain on the list. That's a list that hasn't changed much since I made it when I got back from the Isle of Wight in May!!
There is a box in the garage of all the parts to go on the car and it's growing and growing - time to get my finger out.
Also, some RBRR admin needs doing, I've been organised this year and booked my cheapo train ticket to Coventry so I can get up to Dave's and start the run in the traditional manner, later night beer and curry on Thursday ready to rebuild and MOT whatever vehicle we're using. I think the Atlas camper isn't going to see the RBRR this year, the Atlas van on the other hand is pretty close to an MOT! It runs under it's own power, just. When I can figure out how to do it I will post up a video of Dave doing what he does best, poncing about wasting time with me encouraging him :-)
As for RBRR rides, it's not decided yet - might be the Courier, might be something else - at the moment my entry list says Atlas, Tim's says Courier and Dave says "Something else".......

Thursday, July 24, 2008

Triumph sighted in India

OK not entirely true but I have seen my first Triumph out here - on the TV.
There's an Indian advert for Garnier shampoo, nice Indian lad with flowing hair doing the whole 'be fun young and attractive if you use our product' type thing and in the background is a red Herald convertible. I've only seen the advert twice and the car features for a nano second but nevertheless it is a Triumph.
I am finishing up in the office now and off to Delhi for a dinner then on to the airport to catch the red eye flight back home, eta 9 am tomorrow morning.
Lots of RBRR stuff to catch up with, quite a few changes to the running list and a few more reservists moving up to take up places. All good stuff, I will try and get it update as soon as I know where I am and what time it is!


Jason

-----------------------------------------
Email sent from www.virginmedia.com/email
Virus-checked
using McAfee(R) Software and scanned for spam

Thursday, July 10, 2008

RBRR admin from afar

Just before I left for India I managed to update the RBRR entry list following a couple of changes. It's all up to date on the Comps web site.
When I get back I need to tidy up entry details for all those with missing cars, crews or anything else. Although crews can make changes at any time I do need to have a fully populated list in the first place! So my plea is that if you click on the above link and see your details are incomplete please let have those details by email and I will update it.
Also, a number of crews have been contacted regarding Club Triumph membership, at least one crew member must be a member of the club to run on the RBRR so that means if your membership expires before the start you will need to renew.
We appreciate that in these times of rising fuel costs there may be some crews amongst us who might feel that they cannot afford the event - that is an unfortunate truth and there's little we can do to get around this. So, if you are considering pulling out for this or indeed any other reason please do let me know as soon as possible, I still have crews on the Reserve List all eager and willing to participate.
We will draw a line under the entry list at the end of August and close the entry, any withdrawals will be replaced from the Reserve List.

I'm in India until the end of July, you can reach me by email but please also copy in Tim Bancroft just in case I can't pick it up for a few days.

Jason
From cold, wet and humid Bangalore!

Friday, June 20, 2008

Fancy a Porsche?


Here's the link to my Brother-in-Law's racer that's been languishing for years in his lock-up. He's finally decided to retire from racing and sell it on.

Anyone have any other ideas where to advertise it? I've suggested PPC and Retro mags.

Tuesday, June 17, 2008

More bits and pieces

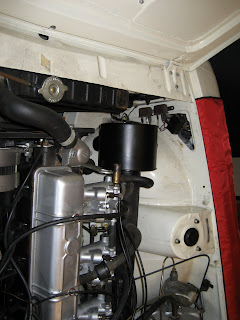
Just a few photos of the fruits of my collecting labours. First the air filter canister, sand blasted and painted in satin black - it came out pretty good I think. I just need to sort out the horn positioning and then I can fit the pipes and the clip thingy that the air pipes attach too. Sorry about the weird angle of the photo, not sure why but I kinda like it! Note also fancy "Snap-on" wing protectors - very gaudy!
Here's my "new" clock and "new" cubby door, much better than the piece of black painted hardboard that I bodged in to make it look a bit better than the scabby hole that was left once I'd removed the Dictaphone thing that was in there. It all works but I can't see how to identify the required key, not that it's a "must have" but it might be useful.
I have apair of NOS external door handles to go on too, I have a mismathced pair on at the moment, one with a Wilmott Breedon key and one with an FS type key - and that one is very stiff despite liberal and regular lubrication.


Finally, the PI steering wheel that I've repaired and restitched mounted on a boss that's been assembled from bits - horn push from here, boss from there, screws and electrical connector from somewhere else - you get the picture!

To be honest I'd rather a chunky Moto-Lita one but despite heavy hints not one steering wheel sized package made it to me for my birthday and I'm far too tight to pay the £250+ for what I want new from Moto-Lita.
I like this blog, lets me feel connected to the Triumph community as I get many emails and personal contact from it - some people offer parts, advice or just friendship and that's great. I couldn't have put all these little odds and ends together without people's help, indeed I didn't know where and how some of them fitted - I'm no Mk1 expert by a long shot. So I was surprised by an email that popped up whilst I was writing this, that email seems to be in response to my post saying "thank you" to a few people.
You see, I've been writing this blog for 4 years now and occasionally I get an idiot, haven't had one for a while but today I got my allocation of idiot. He reads my blog but doesn't like it, so rather than not read it he decided to send me some abuse via the comments section on the blog. I would send him some instructions on how to not read it but I don't think he'd understand and he prefer to stay annonymous.
So to that feckless miscreant - have some balls you silly little man and put your name to your emails, I know you're ashamed of yourself but I'm sure everyone would be interested in who you are.

Monday, June 16, 2008

Collecting bits and pieces

Thanks to the power of the Blog, word of mouth, good fortune and a wanted ad on the Club Triumph web pages I have now collected, bought or borrowed most of the bits I needed. So a few "thank you"s are in order to Dave Pearson, Tim Bancroft, Colin Wake, Doug Thomson, Richard Underwood and Tim Walker who have collectively given, sold or loaned me various parts including a working clock (that keeps excellent time), the centre cubby box fittings including lid, hinges, lining, lock, lock keep etc, a PI steering wheel boss, PI air filter canister (now sand blasted, painted and fitted with new filter element) plus other odds and ends!
I had a tinker on the weekend but didn't get enough time on the car as we had house guests and various functions to attend but at least the cubby box and clock are in place.
I had meant to take the passenger seat out, pull the cover off and re-stitch it where the original seam has parted but that's going to be a long job and I hate leaving the car in pieces so I didn't start it.
I've negotiated a wet flat and machine polish with my brother-in-law (the Porsche mechanic, sorry Technician) in exchange for some sales work - I have to sell his 944 race car which is immaculate and indecently quick. Not road registered, it's a stripped out racer but his level of preparation is so high it looks like it should be in a showroom. I'll sort out some pictures and sit down and write up the spec with him, I think I'll put it on Pistonheads first and then go look for the other free places before we get serious. He doesn't have to sell it so he can take his time. It's worth about £8k so I need to do a good job :-)
Jobs on the PI now are
  1. Check valve clearances, timing and a general tune up
  2. Change oil and filter
  3. Change fuel filter and cure possible leak on filter bowl (might just change the lot)
  4. Sort out PI plumbing in boot
  5. Restitch passenger seat seam
  6. Feed seats (again and again)
  7. Clean carpets - will get the steam carpet cleaner on them I think
  8. Sort out drivers carpet fitting, seems a bit loose
  9. Finish rust proofing
  10. Protect inner arches better - where I tickled them with a grinder to fit wheels
  11. Wet flat and machine polish
  12. Sort out the C pillar vinyl trim - material used is too thick and glue too crap to work
  13. Drill holes in new sills for new finisher fixings and fit sill finishers
  14. Sort out under bonnet horn positions so I can
  15. Fit air box trunking and connect
  16. Fit air horns (non-musical!)
  17. Fix voltage stabiliser issues so fuel and temp gauge work
  18. Adjust choke cable so it works properly
  19. Restore and fit underbonnet sound deadening pad
  20. Replace rusted out overrider with better second hand one
  21. Consider taking off the bumpers and running bumperless (see poll)
  22. Find some shadow blue Stag seats - can I find any with headrests?
  23. Find shadow blue boot carpets
  24. I wonder if I can just find a roll of shadow blue carpet!?
Phew, seems like a lot now I've written it down and I've only got 3 weekends before I'm off to India again. At least I've been able to book some serious time off after that, no holiday this year, I am going tot try and do stuff that doesn't cost and uses up the parts I have!

Monday, June 09, 2008

Thursday, June 05, 2008

An Evening with Brian Culcheth - New CD/DVD

An Evening with Brian Culcheth - New CD/DVD

I was trawling the Internet the other day and stumbled across this from the 2000 register. I recall the talk being on somewhere local but I was working and unable to go - I regretted it as Brian's a good speaker and the subject is close to my heart. Anyway, I sent off my cheque and got the DVD back by return - it's excellent :-) The talk is an hour and you can't pause it or rewind it which is annoying when your wife wants to talk to you but I can live with that. The DVD part of is pretty light on Triumph saloon action but there's Dolly and TR7 fun to be seen - Culch is quite scathing of the TR7 describing it as "a pig of a car to drive" whilst waxing lyrically about the 2.5PI he won the Scottish with.

Well worth it.

Wednesday, June 04, 2008

Lock-up garage for rent in RG1 area of Reading

Now rented for at least 6 months, from 10/10/08

I have a property in Reading that I look after for my parents who live abroad, at the last change of tenants the garage became surplus to the new people's needs. It's a standard single garage in a block in front of the flats, long enough to get a Triumph and loads of spares in. No power or light but it's quiet and reasonably secure (it's never been broken into in the last 10 years+ we've had it) Conventional up and over door and easy access that's always clear.
It's just off the Tilehurst Road near the junction of Prospect Street - walking distance to the station and town centre. I guess you could park your car and walk down to catch the train if you want - come to think of it that might be a good plan!

I'm looking for £35 a month and as far as I can see it'll be available for however long the bill gets paid. I'm happy to keep the garage and flat separate so I don't intend chucking you out - say 3 months notice either way?
We can draw up a formal agreement and there'll be a deposit/up front payment of a couple of months rent so you could be tucking up your next project or your mistresses car for £70 down.
You can't really work on the car there, store nuclear weapons or illegal immigrants in , it's just a lock-up.
Get in touch via this page if you're interested, just make sure you give me your name and a some contact details so I can follow it up.

Now rented out at least until 10/10/09

Monday, May 26, 2008

More Lucas PI info - some pearls of wisdom here :-)

Over the years I've collected loads of info and books about the PI system, some better than others. I have always meant to scan and post up some of the more interesting stuff. I had my scanner working recently (but not on my spanking new Vista equipped PC - incompatible!) so I thought I'd scan a few things when I came across an old trio of A4 sheets held together with a rusty staple. They appear to be pages from a magazine article but from where I don't know.

The last page has a few small adds on it but no clue as to where it first appeared. The opening paragraph suggests and owners club and the adverts are 1990 vintage - if you know where this came from please let me know and I'll give them the credit.

Anyway, I scanned it and OCR'd it and here it is. I've been through it to correct the OCR errors but if anything doesn't make sense shout up and I'll check the original.

THE LUCAS PETROL INJECTION SYSTEM - MARK II

We are very fortunate to be able to publish these notes on the development of the Lucas PI system. These notes by M. H. Evans were sent to Dr. Michael Bingley. M. H. Evans who is chairman of Rolls Royce has kindly given his permission for the notes to be published. They are sure to be of interest to all PI owners.


1. INTRODUCTION

Origin

The Lucas fuel injection system was originally designed for Rolls Royce. Around the end of the war Lucas designed a fuel injection system for the Merlin aero engine (Probably its tank version, the Meteor and later tanks e.g. the Centurion, had Lucas fuel injection instead of a large Zenith carburettor.) It was not a direct fuel injection such as was fitted to German Daimler Benz aero engines of World War 2 as this would have had lost the effect of charge cooling. Lucas continued to design and build fuel systems for Rolls Royce gas turbo aero engines and they still do.

The Lucas petrol injection system however was designed for a particular application of one of the "B" range military and commercial petrol engines produced by Crewe.

These engines, of 4, 6 and 8 cylinders were designed in the late 1930s for motor cars which might have replaced the Phantom Ill, Wraith and Bentley Mk V if war had not intervened. The post-war cars were powered by versions of the B60 and B80, but a major application of these engines was, and is, powering military combat vehicles.

One particular application of a B range engine was a post-war German light tank. A tight spec. was put on this engine. This led to developing a special cylinder head with individual instead of twinned exhaust ports, and also to Lucas developing the fuel injection system in place of the normal carburettors. In finality the tank was not proceeded with, but the fuel system was employed in racing and found its way into certain production Triumph models.


The System

This system, which is fitted to the Triumph 2.5 PI Mks 1 & 2 and Triumph TR5 & 6, is described in the relevant workshop manuals.

The manuals give adequate information for stripping and rebuilding the system, trouble shooting and setting up both throttle butterflies and the pressure relief valve. They do not, however, give sufficient quantitative information on the "correct" settings for the metering unit camtrack and setting rings.

A great deal of useful quantitative information is, however, given in the Lucas Service Training Centre manual entitled "Petrol Injection Mk ll." But even this does not give a lot of background information that would be useful in keeping the system operative in future years when factory replacement became short.

Further information has thus been sought from key personnel within the Lucas organization. The system was designed by Harry Bottoms, who normally designs aero engine fuel systems. It was developed by Jim Littlehales of the Engine Fuelling and Controls Systems Development, commonly referred to in the past as the Injection Lab. Both have contributed information, but the vast majority has come from Jim Littlehales, whose patience with enthusiasts for the system is saintly' it would have been impossible for him to have helped more.


2. THE INLET MANIFOLDS

Original Design

When I first spoke to Harry Bottoms in 1973 he was horrified to hear that 6 separate inlet pipes and butterflies had been fitted. His original design called for only one or at most two. Fitting six brings obvious synchronization problems.

Early Pattern

Inlets fitted to the Mk 1, and possibly early Mk 2's had individual tickover stop adjusters. Throttles were operated by separate rods which operated the crank of each inlet pair. These rods were actuated by a master shaft below the inlets. These rods were adjustable for length with the result that tickover and pickup were both easy to set up.

Later Pattern

Later systems, for some reason, work on the basis of the first inlet pair butterfly spindle picking up the second, and the second picking up the third through crank levers similar to the systems with multiple SUs. Tickover stops are not fitted and it is much more difficult to achieve a smooth pickup from tickover than with the earlier system. This is because the first pair open before the second and the second before the third once there is any wear on the spindles. For reasons I have been unable to find, this later system, is fitted with a double interlinking balance pipe between the three pairs of inlet castings. Earlier systems only had one balance pipe and seemed to work perfectly well.


3. INJECTORS

These are simple in design compared with diesel injectors. They do not have to contend with the pressures and temperatures of the combustion chamber as they are mounted in the inlet manifold.


First Type

The earliest pattern of at least three designs fitted was designed by Jim Littlehales. It is illustrated in the injection manual. This pattern has a nylon collar which is screw threaded onto the injector barrel. The inner bore is tapered and honed. Thus, when the injector itself is fitted, its "O" ring seal is progressively compressed to form a seal. As far as Jim can remember, no spring circlip was fitted on the nose to retain the injector insert. It was unnecessary as the "O" ring effectively held the insert in place. CAV made these early injectors.

This pattern was dropped once the value engineers got their hands on the system because the screw thread taper bores were costly to make.


Second Type

A further pattern was introduced of which Jim has little clear memory. In this, the injector insert appears to have been inserted from the front end of the injection barrel, the barrel then being swaged over to retain it. They appear to have had no "O" ring seal and to have relied on metal to metal contact of ground faces for sealing. The actual injector was identical to that in the earlier unit except that there was no pip on the valve. The pip was the original grinding centre.


Last and Most Common Type

The third kind, and by far the most common, looks on first sight to be identical to the second, except in that the valve has the pip once more, like the original. These are built, like the original, with an "C" ring seal, but in place of the taper bore there is a stepped bore of two parallel diameters. When replacing the internal "O" ring seal therefore it is necessary to use a thick oil to prevent damage to the "O" ring when it meets the sharp edge at the change in internal diameter. The injector insert is retained in this design by a circular spring ring on the nose of the insert. As with the second pattern, the nylon block is a press fit on the injector barrel.


Dribbling

Whilst Jim Littlehales never experienced leakage problems with the inner 'C' ring seals, this has not been the experience of others who have run cars with this system for many miles. The injector inserts tend to shuffle a little in the injector barrels. Carbon gets between the barrel and the 'C' ring and wears the ring until it is a 'D' section instead of an 'O'. It then starts dribbling, but can be cured with a new 'O' ring once the bore has been carefully cleaned.

Some of the third pattern were manufactured with too short a thread engagement in the inner nylon adjuster nut. They unthreaded themselves and the injector valve then damaged below the valve seat. The nylon adjuster is an interference fit on the thread and is adjusted with concentric Allen Keys on all three types.

Injector Performance

Injectors should blow at between 47.5 and 50 psi. They are all right at anything above 45 up to 55. They should give an even cone spray. There should be no leakage at all at a pressure of 5 psi below their blow off setting. This is what Jim said when I last saw him but I believe there was a production standard of several drops per minute allowable leakage.

Rough running can be experienced if injectors dribble although this has little effect on fuel consumption, if any.


4. INJECTOR LEAD NON-RETURN VALVES

These are located at the junction of each pipe with the metering unit. The valve looks to be of neoprene although Jim describes it as hard rubber. They are designed with plenty of clearance between the valve and the bore in which they are located. In theory this allows the valve to process around on its seating. In practice, however, they tend to stay on the same spot and continuous operation tends to produce a circular groove on the valve face. They then leak, allowing the residual pressure caused by the elasticity of the fuel line to leak back into the metering unit. The next injection stroke of the metering unit therefore spends much of its energy re-expanding the pipe instead of forcing the correct quantity of fuel out of the injector. Also, after running, heat from the engine can vaporize the fuel in the pipe and it then takes a long time to reprime. That cylinder runs "dead" until the line refills. The neoprene valve face needs carefully rubbing flat again if leakage occurs.


5. METERING UNITS

Return Pipe

Early metering units had a "push on" rubber connector to the fuel return pipe. Later ones had a screw on connection. If the return pipe gets blocked, and this is not an uncommon fault, pressure rises in the unit and forces the diaphragm between the metering barrel and cambox towards the latter. This tends to prevent the roller climbing to the maximum depression the fuel is in weak condition up the camtrack. in consequence fuel consumption is increased. The pipe can usually be unblocked either by using a foot pump or airline on the return pipe, or by carefully pushing soft iron wire down it.

Golden Units

One cause of blockage can be copper particles in the return pipe. This happens if the lead rich copper end thrust washer on the metering barrel wears, as the swarf returns by the pipe to the fuel tank. Bill Phelps came across this problem, which in its extreme reduces the alignment of the barrel ports with the injector lines. This reduces fuel delivery to the injectors. When I reported this to Jim Littlehales he said that this problem did occur and that units so affected were referred to as "golden units". Petrol has a low lubricity and, he said, if the end washer did not sit exactly at right angles to the bore (i.e. parallel to the face on which it sits) the petrol escapes unevenly and wear sets in on the "high spot". Once this happens, the process of wear is very rapid. It also has the effect of increasing the clearance between the rollers, camtrack and piston stop, thus making the unit go "fuel rich". A few thou can absolutely ruin fuel consumption. Clearance between the metering barrel and its sleeve, incidentally is a fraction of a thou, although subject to variation in manufacturing tolerance . Tolerances are unusually fine for car components.

Lubrication

The shaft on which the rollers run should be lubricated with a little moly green or moly additive. The piston stop should not need lubricating. Jim Littlehales says they should run in an oilite bush. However, I have seen signs of "pick up" on the piston stop. Jim says that if lubricated at all, it should be with a thin oil like 3 in 1.

Springs

The springs in the diaphragm capsule are critical and must not be changed unless the capsule nuts and camtrack are recalibrated.

A critical fault occurred in some units. The high rate "second" springs were feather ended. In other words the end coil, ground flat and therefore thin to give the spring a flat end, did not touch the first full section coil. As a result the high rate spring did not have sufficient rate until the feather end had deflected enough to touch the next coil. The first part of the spring's compression happened too easily. This has the result of putting a fuel rich kink in the depression/fuel delivery working line right where you don't want it - in the very middle of the normal driving range. A possible cure would be a blob of Araldite to support the feather end on the next coil. This fault is always worth looking for. Feather ends were sporadic throughout production - not just an occasional batch problem.

Wear And Roller Pin & Cam Setting

Frettage corrosion can occur on the pin if run dry. When this happens it increases the clearance between the rollers and the piston stop. The cure is to readjust the camtrack to .002" and .058" clearance at either end of its working range, using feeler gauges. This is easily done with the capsule springs removed using the mouth to suck on a pipe to raise the rollers to their to position. Measurements should be made with the unit in its normal operating attitude and the feeler gauges should be stroked downwards, not upwards, to retain the correct positions given by gravity when there is any "play" either in the nylon ball-joint or roller pin.

Camplates

These are hardened steel and do not wear. However, the constant hammering of the metering shuttle can move the camplate away from the rollers by rotating it about its fulcrum. This sends the system fuel rich. Two setscrews hold the camplate in position on the fulcrum arm. In some cases these are cross slotted screws. Others are Phillips or Posidrive. The former can be adequately tightened whereas the latter have proved unsatisfactory in my experience. The centre tends to trepan out before the screw is tight enough. When tightening these screws I apply Loctite then leave the unit for 24 hours before using it again. On my Mk1 PI my fuel consumption was around 19.7 on overall running - much of which was my 17 mile drives to and from work - until I reset the camtrack. After resetting this went up to 27.4.

Faults of the System

The final demise of the system was the difficulty of meeting the emission control regulations especially at the very low fuel delivery quantities at tickover and low throttle openings. The system had by then already got itself a bad reputation. In part this was because garages did not understand the system and could not set it up correctly. It was also partly due to manufacturing problems with the system. As developed the system was excellent but the value engineers cheapened important bits of it. Furthermore, when manufacture transferred from Lucas Aerospace to Lucas Automotive, the criticality of manufacture was lost. It has been said that the people building the all important fuel pump motors "thought they were building windscreen wiper motors". Oil got under the commutator segments during motor manufacture, with the result that the segments lifted and then the motors failed. Pump shaft seals wore and allowed fuel to leak into the motor. All these problems were overcome in due course, but rather late in the day.

Emission Control

There is obviously a small (but variable in manufacturing terms) clearance between the metering barrel and its sleeve. As a result "inter port" leakage takes place, thus increasing fuel consumption. The greater the clearance, the greater the leakage. It can be as much as 20% more than the quantity metered at small shuttle movements. In 1973 Lucas therefore introduced three production standards - A, B and C. These are marked on the metering unit if built after about July of that year. The unit was run at 2.50 rpm rotor speed and a 0.010 shuttle stroke. Using petrol, average measured quantities per 1000 injections (1000 revolutions) had to be as follows:
A - 8.4 cc to 8.9 cc

B - 7.8 cc to 8.3 cc

C - 7.2 cc to 7.8 cc

All plus or minus 10% with petrol.

Green Top Units

At the end of the production period a three spring capsule was introduced to attempt to get a little nearer to the theoretical depression/delivery curve requirement. These units had a green plastic cap on the adjuster nuts and were called "green top" units. They were only a marginal improvement in attempting to meet emission regulations and few were fitted to cars.

Springs

I have a metering unit with square section springs. Jim Littlehales cannot recall any of these and is suspicious that the springs are not original. He believes all springs were manufactured from round section wire. He told me to check the cam clearances at various depressions against the data in the manual to see if the unit was properly set up.

Pressure Relief Valve Design

The pressure relief valve is a very neat piece of design and was the work of Harry Bottoms. It is very well finished, as are many parts of the injection system. The quality being above normal motor practice and reminiscent of aero engine components prior to World War 2. It does not, however, approach modern practice.

Function

The function of the valve is to maintain fuel pressure at between 100 and 110 psi when the car is running. However it is also designed to achieve one other thing. A concern from the outset of the system design was the case of a "dry tank". In this situation the system had to be capable of repriming itself and the relief valve is designed to facilitate this. Early systems (about 70) had a "well" or small tank alongside the pump. This filled by gravity from the main fuel tank. If the main tank ran dry the first fuel put in it would run down the well. The well was fitted with an air vent pipe which connected to the top of the tank. It could have vented the atmosphere above the fuel tank "full" level except that it is both safer to close circuit back to the tank and also ensures that any air passing down the pipe is filtered (see "filters"). This return pipe allowed the air in the well to be displaced when the fuel flowed in, the well thereby filling completely.

Its Operation

Supposing the system to be dry, the pump will deliver air at a pressure of about 20 psi. At 20 psi the relief valve begins to open. In doing so small bleed holes are uncovered. These allow the air to escape through the valve and back to the fuel tank. Once the air is displaced and fuel flows, fuel begins to flow through the bleed holes. However, as it is denser than air, it cannot escape as fast as the pump delivers it. The pressure then builds up further and at 60 psi the valve moves further, cutting off the bleed holes. No more bleed occurs until the full operating pressure of 100 - 110 psi is reached when the main valve opens. PRESSURE SHOULD NEVER BE BELOW 100 psi at "full chat" on the road according to Jim Littlehales or misfiring will occur.

FILTRATION

Cleanliness of fuel is essential with the system. There is a full flow main filter between the fuel tank and the fuel pump. There are two small coarse filters in the pump inlet and outlet elbows. There is a small nylon filter in each injector barrel and I think, one in the metering unit. Air entering the fuel tank to replace burned petrol is also filtered. There is only one place that a filter is needed but not fitted and that is on the fuel pump breather pipe (see FUEL PUMP).

Early systems had the well referred to in the previous section. Petrol entering it was filtered through a very tiny unit which according to the handbook, was to be changed at something like 12,000 mile intervals. It was totally inadequate. A small quantity of water in the fuel was all it needed to block the filter partially. If the fuel level was low or even with plenty of fuel if you turned left suddenly, the fuel pump found it easier to suck air down the well's breather pipe than from the tank. The filter assumed gravity would always force fuel through the filter down into the well. My engine used to cut out on my 2.5 Mk1 on left hand corners for 2 - 3 seconds while the pump screamed. Colleagues at Hucknell nearly rammed me behind on several occasions when we were hurrying over from Derby to get to work on time. I asked Jim Littlehales what to do. He told me to throw away the well and fit a CAV diesel oil filter (which was similar to or the same as fitted to 2.5 Mk 2 cars). He said it would pass nothing above 2 microns. I did this, but retained the well although clipping the vent pipe so that its maximum rate of passing air was greatly reduced. I never had any more problems. Recently Jim has warned me that these CAV elements are not flushed on production and that fibres can get into the pump and cause damage. He suggests giving a new filter element a really good wash out before fitting it I do, not believe any of the other filters are important, except perhaps the air filter on the fuel tank, and that is doubtful as the breather pipe is very long, goes downhill all the way, and fuel does not burn quickly enough for air movement up the pipe to be speedy enough to carry dust with it.

The Pump

Reliability

The pump is the only part of the system that can let you down completely and leave you stranded. They can do so with absolutely no warning at all. I have had many fail on me.

As originally designed, it was a good piece of equipment but the value engineers got their hands on it and the troubles started. Slowly, their integrity was restored and late pumps were generally very good.

Regardless of date of manufacture, pumps vary greatly. Some have lasted me just over a year. One especially selected for its low current consumption for me by Jim Littlehales ran from the summer of 1975 to the autumn of 1978 when it aired. Cleaned, it resumed work in the summer of 1979 and, at the time of writing, is going as beautifully as ever. The one originally fitted to my 2.5 PI MK 2 ran from 1 January 1975 till the summer of 1979, and the pump on Jim Littlehales own car ran from something like 1972 or 3 until just after my original MK 2 failed in the summer of 1979. Even then it didn't really fail it occasionally skipped a beat. On examination it was found that the carbon brushes had worn out completely and the copper rat tail brush heads were lying on the commutator and supplying the current.

Early Failures

My first failure was of a shaft seal on my MK 1. The pump was then 3½ years old. It did not leak fuel down the vent but entrained air through the seal in some quantities. It thus pumped an aerated mixture, especially when hot. This caused restarting problems and the best solution was not to switch the engine off if avoidable in hot weather.

My second failure followed about a year later. The bearing pins of the pump gearwheels wore until the gears started to cut into the pump casing centre (figure 8 aperture) plate. Since then I have never had any real problem with the actual pump part of the unit.

Later Failures

Recent failures have been of the motor. In almost every case, stripping and carefully cleaning the commutator restores the unit to continued good service. I have done this many times and the pump can run, trouble free, for as long again.

The Motor Bearings

The rotating assembly is supported by two spherically mounted oilite bushes, and positioned at one end by a thin steel thrust washer bearing on one face against a bush and on the other against a circlip on the motor shaft. The other end is positioned by a nylon buffer on the end of the adjustable setscrew projecting from the motor casing's end. I have never experienced pump bearing problems either with bushes or the shaft.

Motor Rotating Assembly

These vary in current consumption. Good ones absorb less than 5.8 A and poorer ones well over 6 A. Jim always prefers 6 A max. (5.8 for hot countries as heat causes cavitation). Lucas manuals are a little ambitious in their claims. Windings can burn out. It has happened to me once.

Commutators at one stage gave mechanical trouble. Oil got below the segments during manufacture with the result that sooner or later they came apart. This problem did not last long. With time however, on all pumps the commutator gets dirty and a certain amount of burning of the copper takes place, causing the pump to stop working. I clean them by mounting the rotating assembly in an electric drill to spin it then gently rubbing fine sandpaper on the commutators. Once this shows as smooth and bright copper all the way round again, I use fine, blunted sandpaper to polish the commutator and finally Duraglit wrapped in a piece of old handkerchief. I then clean out the gaps with a needle and finally clean with a hanky moistened with "tric" or "carbontet". Wrap sellotape on the shaft before "chucking" in the drill.

Brushes

Brushes give no trouble other than in that they wear very slowly away. When reassembling a motor be careful not to let the rat tail brush heads get caught behind the brush holders as, with wear, the brushes will be restrained from moving for- ward and maintaining contact with the commutator.

Leads

Heat and/or petrol vapour can harden the plastic covering. New leads can be made and soldered on to the brush holders although the originals are welded on. Jim Littlehales told me this.

Replacing Brushes

Someone once told me that the paxolin brush, deck and brushes from a Lucas windscreen wiper motor will fit, although only two of the three brushes are needed. I have never tried it has not been necessary.

Heating

According to their current consumption and state of wear, motors can get very hot. They normally run too hot to touch comfortably. After a long run on a summer's day the heat will sink from the motor into the pump on a car that has stopped. Fuel then evaporates and the pump screams. The car often will not start until the whole thing has cooled down. During running the fuel cools the pump so no problem arises. The problem is accentuated in a hot climate.

Best cure courtesy Jim Littlehales is to install a pump cooler. Wrap ¼" bundy pipe in a spiral round a mandrel of slightly smaller diameter than the motor. Then spring the coil open a bit and work it over the pump housing. Connect the bleed valve return fuel flow to the copper pipe. It then provides fuel cooling, the warmed fuel returning to the tank. This works well. A cruder cure is to slap a rag soaked in water onto the motor in hot weather. It does work. Bill Phelps suggested that mounting the pump vertically should help, motor up and pump down, as heat rises.

Magnets

Their power varies but Jim Littlehales does not see this affecting current consumption. They can however crack, so if removing them to clean the motor housing, slide them out with care. Replace them the right way round afterwards!

Noise

Some are quiet, some are noisy, some start noisy and run quieter as they warm up. The noise dips and rises with the flashes of the indicator, or application of brakes. This is only the effect of variation in the current supply available. It is not a cause for concern. Minimum noise requires ½ turn of end float on the endfloat adjusting setscrew.

Vent Pipe

Between the motor housing and the shaft seal which isolates the motor from the pump there is a vent pipe which exhausts through the car floor onto the ground. It is intended to dump any petrol that leaks past the shaft seal and prevent its entering the motor. With a horizontally mounted motor as in the 2.5 PI saloon one wonders if it picks up all the leaking fuel or whether some reaches the motor. In the estate the pump is mounted vertically and this should ensure that any leaking fuel is dumped, quite apart from being a better way of keeping the motor's heat away from the pump.

The vent pipe is the one point in the system where a filter should be fitted, but there is none. This is because the pipe exhausts at one of the dirtiest and dustiest points possible - right behind the rear wheel of the car. This would be fine if no air ever moved up the pipe, but does. When the car is run, the motor heats. The air inside expands and some is expelled. When the car stops, the motor cools and air is sucked up inside the pipe. Quite apart from this the shaft seal usually leaks a little - fuel out when stationary and sometimes when running - air in when the engine is running in many cases. Minute differences in the pump determine whether the seal is subjected to pressure or a depression. Many pumps actually suck air in past the seal and feed it into the system under pressure with the fuel. This causes erosion when the air is humid.

My solution is to push a bit of cellular plastic foam up the vent pipe and, from time to time, moisten it with a squirt of WD40. It is easy to do and at least gives a measure of filtration to the air.

Shaft Seal

The shaft seal as originally designed was in Viton but value engineers changed this for a cheaper and less satisfactory material. Pumps today again have the seal made in Viton and it is very satisfactory. It is a standard proprietary seal made by George Angur.

The seal runs with less interference on the shaft than such a seal normally would. The pressures are not very great and too much friction would cause undue heating. As it is, the Viton seal is rather hard when cold and tends to leak a little until it warms up. It warms quickly once the motor starts however, through friction.

As stated elsewhere in this document, the seal can allow air to pass into the pump or fuel to leak out. If damp air is sucked in, corrosion takes place on the motor shaft and the rust particles stick to the seal lip. They act as an abrasive and a groove is worn in the shaft by the seal. The seal then becomes less effective in its functioning. 1 have seen a number of pumps so affected.

The seal is to some degree lubricated - by petrol splashed at it by the helices on the plastic drive coupling between the motor shaft and pump drive gear. Provided the seal lip is at least wet, it is lubricated.

The Pump

The pump itself consists of three brass plates. The rear one incorporates the inlet and outlet unions and carries the bearing pins for the two pump gear-wheels. The centre plate incorporates a figure of eight aperture to accommodate the two pump gears. The front plate - thin on very early pumps but beefed up on later ones as they distorted under the working pressure inside the pump - abuts to the motor and has one aperture through Which the drive gear passes to its coupling to the meter.

The pump is made to exceedingly tight tolerances and these are critical.

Clearance Gear Faces

The centre plate is slightly thicker than the gear wheels so that there is a running clearance between the gearwheels and the top and bottom plates. The production tolerance on total clearance for the gears was 0.0002" - 0.0008" (2/10 to 8/10 thou). In practice Lucas aimed with great care to achieve 0.0004" (4110 thou) on production build. Above 8/10 thou clearance the pump rapidly loses flow and becomes useless. That is why the tolerance is so critical. (1/10 thou extra clearance loses you 1 gallon/hour at 100 psi approx.)

Clearance Gear Teeth

The clearance peripherally between the gear teeth and the figure of eight aperture is nominally 0.004" (4 thou). Again this is critical. Above that figure you lose one gallon per hour pumping capacity at 100 psi for every extra thou of clearance. Several thou, therefore, and you have zero flow.

There is considerable clearance between the tips of the teeth on the gearwheels and the roots of the teeth on the mating wheel. This is to prevent hydraulic locking occurring by fuel being trapped between the teeth when they mesh.

Bearings

The gearwheels are bushed and run on hardened and ground steel pins mounted in the bottom plate. The driven gear pin is not provided with special means of lubrication but the drive gear pin is. It is hollow and has a hole bored at right angles into it. Fuel flows down the inside of the pin and lubricates the bush through the side drilling.

The bushes in the gearwheels are of a special carbon which has a copper content. The copper is to conduct the heat away which carbon on its own would not. As far as Jim Littlehales can remember, this is Morganite MY3D. The bush is fitted into the gearwheel with virtually zero clearance. The clearance in fact is 0.00005 (½ a tenth of a thou). Inserting the bush normally gives the slightest shaving to the bush.

Bearing clearance between the bush and bearing pin is nominally 0.001 " (one thou) but this is not as critical as the surface finish in the bush bore. There is only one way to get this finish, and it can be done by hand. Use a soft mild steel bar and have syntox (aluminium oxide) sprayed onto it. Then grind the syntox parallel on a diamond wheel. Place the rod in the carbon bush and polish it. It will give a mirror finish.

Bearing Wear

Bushes can pick up metal particles and then they will cut up the bearing pins rapidly. I have only seen this in one (my second ever) pump. Strangely, Jim Littlehales once saw a pump in which the bush to bearing clearances had become massive. The gears had cut their way into the centre plate creating a "pregnant" figure of 8 aperture. It still worked and still pumped fuel.

Gear Corrosion

They don't.

Gear Manufacture

Gears are ground and through hardened. Early gears were hobbed but this left striations on the teeth. Grinding was found more satisfactory.

Wear Between Gear Facings and Plates

In theory there is high pressure on one side of the gears (c 100 psi) and low on the other so a slight leakage occurs across the gear faces and lubricates them. In practice the flow tends to set up on one face rather than both faces of the gear. The other face can therefore run dry and cause friction, heat and wear. In the early days of developing the Mk 1 system Jim Littlehales tried just about everything to achieve lubrication of the gear faces. Finally, in desperation, he inscribed a helical groove on a gear face with a scriber. To his surprise the current consumption of the motor went down, showing that lubrication had been effected. It became known as "Jim's Groove" although its precise functioning was not fully understood. Any loose fibres from the filter used to work their way down the groove and form a blockage. In effect the blockage became a disc brake pad. Mk 2 systems do not use Jim's Groove.

Gears can cause grooving of the top or bottom plate. 1 have seen both although Jim says they are common on the pin plates below the drive gear. As Jim says, they are not very important as they tend to look a lot worse than they really are.

Restoring Side Plate Clearance

If it is desired to remove the grooves, the top and bottom plates can be restored but the centre figure of 8 plate must not be touched as its thickness is so critical. use brand new wet and dry paper on a completely flat surface - a measuring table or piece of optically ground glass of size than the brass plate. The wet and dry must have no kinks or creases.

After sanding you must rub the surface with your fingers with paraffin and keep doing this until your fingers remain clean. This will remove the embedded particles. Lastly, place clean paper on your flat surface and pour Brasso on it rub the plate on the paper

Friday, May 23, 2008

Lucas PI Fault Cards - a public information service


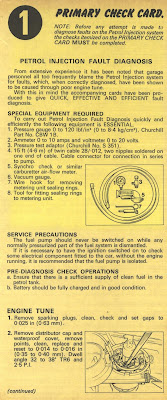
I've been meaning to do this for ages and have now found an easy way to publish these most usedful documents. If you want to download and save them you should be able to get a larger version by clicking on each image.

The cards are really good and, as they were printed in response to all the "problems" of PI over the preceeding years they do seem to be pretty comprehensive.

May the vacuum be with you.
Posted by Picasa

Lucas PI Fault Card Check List


Posted by Picasa

Lucas PI Fault Card 6 Supplement

Posted by Picasa

Lucas PI Fault Card 6


Posted by Picasa

Lucas PI Fault Card 5


Posted by Picasa

Lucas PI Fault Card 4


Posted by Picasa

Lucas PI Fault Card 3


Posted by Picasa

Lucas PI Fault Card 2


Posted by Picasa

Lucas PI Fault Card 1


Posted by Picasa

Sunday, May 18, 2008

Bleeding clutch

The clutch on my PI is bled, I took the advice of those who've done this job before and I used the Eazibleed at 30psi and it bled first time, I need to shuffle some cars and take it for a spin to test it but it feels nice. I used a new Witor spring with an alloy cap (in place of the plastic one) not sure why but that's what he sent me. Pedal feels firm and positive now. The old seals weren't totally knackered but the fluid (new silicon) was full of black bits when I cleaned it all out and on close inspection the main seal does seem a little deformed. The new spring was noticeably longer than the old one which was in one piece and felt OK - I'll keep it for a "spare".

The Master cylinder bore looked good so I gave it a little hone and cleaned it all up.

It's a bit of a fiddly job under the dash but it was all pretty straight forward - reassembling the master cylinder was a bit of a pain, getting that new seal in place made my fingers ache!

I even turned the interior door handles round the way I think they should go and had a fiddle with the choke cables I've bought but then found that I don't have an y trunnions for the ends - well at least I do but I can't find them! Still teh cables in place and seems to fit, the microswitch didn't work on the "new" cable so I fitted the old one back on - seems OK. The knob's not right but doesn't look too bad - I think I have a Mk2 cable there. The old knob might come off with a hacksaw and I could make it fit but let's get the mechanism owrking before I mess about with my knob ;-)

The new plug leads seem to work but I kind of ran out of time, energy before the test drive (have to move 2 cars to get it out!) so I'll test it all another day.

Yup, today was a good day.

Friday, May 16, 2008

I feel the need......

...to blog.
It's a strange thing but I just feel rather frustrated, I'm sat listening to a "conference call" at the moment. This is what I do now instead of meetings, we all call up a number and try and sound like we know what we're doing whilst in fact we could all be doing anything! This one's even more tedious than usual as it's an HR show and tell call where I;m only really required to listen.
Anyway, went up to Liverpool this week, dropped in to see Dave Pearson on the way, collected some bits for the PI that he's promised me. Also paid money for some new stuff - a set of plug lead (all will be explained) and some dizzy "O" rings to see if I can cure the oil leak out of the dizzy drive.
The rest of the parts to fix the clutch had also arrived along with some trim clips for the sill finishers. So now I loads of jobs for the weekend :-)
The HT leads are for an experiment and it goes a little something like this.
I have some very nice Magnecor leads on the PI, they were expensive but well made, I had them on the Vitesse before.
On the Isle of Wight I experienced a misfire, couldn't trace it but every time I popped the bonnet and had a fiddle it seemed to go away. I then thought that the leads were working loose where they connect to the distributor cap - every time I checked them there seems to be space for movement, ie I could push them down onto the dizzy cap. The "boots" over the connections are chunky and I think they are pushing the leads off the cap somehow.
OK all this seems rather weird and unlikely so I just bought a cheap set of standard leads so I can swap the lot out and run with the cheapo ones on to see if that isolates the problem. We'll see - of course I'm not going anywhere until I fix the clutch!
Whilst in Liverpool I delivered an eBay item I sold to a guy who came over from Huddersfield - cheaper than the postage for him and no hassle for me really.
I was even able to drop back into Dave's on the way home, talk him out of some more bits for which I had to buy all the beers and crisps (he drives a hard bargain). As part of my courier duties I also picked up a forgotten engine component for Carl, it's sat on my desk now mate!
Well the call is coming to the bit where I have to talk so time to sign off and do some real work....

Thursday, May 08, 2008

I am sorry

I've had a mention in the Canley Classics - Blog today but not in a good way :-(

You see I had a couple of interesting incidents on the first Ten Countries Run and, well I'm not being allowed to forget them. To be fair neither is the Stretch as it still bears the scar of what I did to it - I drove off from a petrol station forgetting that the thing is 22 foot long and the rear wheels don't steer. Not a problem in a Herald but a big problem in the Stretch when there's a petrol pump in the way. Crunch! I always said I'd fix it....

Still several years later Dave's daughter did a very similar bit of damage to my Vitesse after last year's La Carrera Caledonia and Dave said he'd fix that - same promise I made to him :-) I sold that car with the parts to fix it, much like Dave is doing with the Stretch.

I have very happy memories of that Stretch, foolish monster that it is you can't help but smile when you see it and driving it is just surreal.

It's as big as a whale and it's about to set sail....

Tuesday, April 29, 2008

Broken brakes!

Yes it didn't take long to break the PI but then you do need to lay spanners upon a new car sometime.
I took it out for a blat and had one of those funny pedal moments where you think "Hey up, this doesn't feel right" so I drove home carefully without using the brakes much. I parked up and took a look in the fluid reservoir - low. Hmmm, lets have a looksee under the car and there it was, immediately obvious. Brake fluid all over the inside of the front wheel on the driver's side. Damn! One of the Stag calipers was NOS and one was a reconditioned one - they were provided by the previous owner for fitting so their provenance was uncertain. Yup - the NOS one was fine and it was the nice shiny plated new one that had let go. It was hard to see where the fluid was coming from but it was obvious that it was going to have to come out for a looksee.
It all looked OK but it obviously wasn't. I tested it as best I could on the bench and then stripped it, separating the calipers to find that the seal inside didn't look like the replacement - it was smaller, not so tall. It wasn't obvious where they had been leaking so I pulled all the seals out, cleaned it all up and examined for cracks or other defects. I then rebuilt the caliper with new seals, refitted and bled the brakes - I was going to go out for a test drive but it's hammering down with rain here now and frankly I don't want to go out in it inless I have to!
I'll go for a test drive tomorrow and see if that's fixed it, I hope so as so far my attempts to fix other stuff have failed miserably - the fuel gauge is still all over the place, new stabiliser on the way.
As for the Vitesse, the new owner is coming tomorrow to pay the balance and take it away. I'll be sorry to see it go but then nothing lasts forever.

Friday, April 25, 2008

In the pink


a certain well known Triumph Club secretary recently destroyed a perfectly good diff. In the past he had complained to a certain well known builder of Triumph mechanical units about the colour of paint used by said builder - the previous diff having been painted yellow and green. Anyway, said rebuilder asked me to obtain a suitable colour paint for the new unit, so I thought something in keeping with the Club Secretary's standing in the Triumph community - flourescent pink!
I do like to help out where I can.

Well that didn't last long

The Vitesse just sold - email, phone call, viewing and deal done in hours - as is with no MOT - what can I say? I am most pleased indeed, I'll be sorry to see it go but at least I'm back in the good books with Mrs C and I can now work on the PI with a clear conscience :-)

Saturday, April 19, 2008

I've really gone and done it now.....

The Vitesse is definitely up for sale - Mrs C has explained it to me, no work can commence on the PI until the Vitesse is gone and as her car is out on the drive and both mine are in the garage it's getting rather political - If I take one out I'm sure she'll steal the garage for her Saab!

Pisonheads seemed like a good place to start, I'll do Club Triumph next although most will know it's for sale anyway - Pistonheads was easy Triumph : Vitesse Convertible - 2.6 injection and I had a call on it within a hour of it being uploaded!

I've got some fettling to do to get an MOT, nothing major - the new steering coupling seems loose but it was a bitch to fit so I'll have another swearing session at that, I think it just needs pinching up but it's one of those cast ones and they seem to be rather substantial!
Tunnel cover needs to come off to fix the overdrive inhibitor switch properly, last done in a German car park at 3am - it won't allow overdrive in third, only in top - needs a tweak.
The clutch fluid dropped over the 10CR so I'm going to replace the master cylinder with a spare.
The brakes need adjusting and she needs an oil and filter change and a general service.
Other than that she's ready to go.

I've decided that I won't be greedy and I'll pass on my good fortune in buying the PI so the price is £3500. The fancy leather Sparco rally seats and the hardtop I will sell separately after the car is sold in case the new owner wants them. The seats were terribly expensive but they are great, I even considered them in the PI but dismissed it as a silly idea.

In the meantime, I'm having a clear out on eBay http://search.ebay.co.uk/_W0QQsassZchinn2002 some interesting stuff in with the usual crap, if you need anything for your Vitesse just shout :-)

Friday, April 18, 2008

Tax doesn't have to be taxing!

When I got the PI it had been off the road since about 1977/78. The previous owner had applied for and got a V5 but the taxation class said "NOT LICENSED" although the date of first registration is stated as "27 06 1969 (DECL/D MANUF 1969)".
I had taken a chance and driven it home but knew that I needed to get some sort of tax disc in the car despite the fact that it's free.
Anyway, I'd written to the DVLA but thought I'd have a got in the Post Office as I'd like to get some miles on the car in the coming weeks to shake it down. Unsurprisingly the Post Office weren't much help and the miserable old fossil behind the counter just said "You can't do that here, take it to the DVLA" well it turned out that there's a Local DVLA office just round the corner from me in Theale.
What a great place! Clean and tidy and free from old gits behind the counter, nice modern ticket queue system and chairs to sit in. Nice bubbly young totty behind the counter who filled in some forms and gave me my free tax disc and said she'd get me a new V5C from Swansea.
Bonus!

I also had a good trip up to Liverpool via eBay purchase in Stoke. The sill trims are fine, worth £23 and Chris, the seller was good company to chat too, ready with the tea too :-)

He is a 2000 Mk1 fan of old but following a motor accident he lost his arm and can't drive his Mk1 so he was rationalising his spares and will be selling off his Mk1 2000. I didn't see the car but he asked me to put the word out if anyone is interested. It's in Stoke and I can give you Chris's email address if you're interested. He told me it's a 1966 2000 Mk1 in white with black interior and a sunroof. It was on the road 12 months ago but failed the MOT due to rust in the front rigger (a common rot spot) the car comes with the parts to repair but as Chris can't do it himself and can't drive the car after he wants to sell it. He's looking for £600.

I've no financial interest in the car or the seller and you know what I know but if anyone wants more info just drop me a line with your email address and I'll give you his contact details.

Monday, April 14, 2008

A little shopping

I can't resist eBay and it turns up such good stuff just when you need it. 1 item ticked off my "wish" list is a pair of sill finishers, the PI came with none so I'm quite happy. As a bonus they are in Stoke which I pass on my way up to Liverpool every other week - I just happen to be going on Wednesday so I won't have to trust them to the Post Office.
I won't be able to fit them as I don't yet have the clips and I think I may get killed if I start working on this car whilst the Vitesse is still here! That needs a few jobs and an MOT but I have the parts and will get some time on it this weekend I hope.

Saturday, April 12, 2008

It's home!

Well it's been a good few days. I got a lift up to Dave's place on Thursday afternoon and started the tinkering. Dave left me too it but it was good to have him around to help with my stupid questions and hamfisted ways of doing things!


The car looks good on those KN Gemini wheels, they fill the arches really well with 195/60 15 Toyo Proxies on. I had some issues with the wheels over the Stag brakes, I hadn't realised just how much bigger the Stage brake drums are. It looked like the lettering on the brake drums was fouling the wheels, so I had at it with the angle grinder and they were better but still not good. The drum and wheel were not in full contact, I needed spacers. Went down to the local factors and picked up some 3mm and 5mm ones, the 5 mm ones were good.
Whilst the wheels were off I also too the grinder to the arch flanges - just to be on the safe side. Now with the extra clearance I can get two fag papers in the gap ;-)

Just thought I'd pop this one in, new Konis, new Witor springs, recon driveshafts and arms, Stage brakes with new cylinders, all new lines. The brakes got a bit dusty but they were fine once I blew that off. The black you see is rust proofing - Dynotrol
I started adding up what the previous owner had spent on the car, I stopped when I got to twice what I paid and that was before I added in any labour as he'd had it all done for him. I've been really lucky here and I'm so pleased I was in the right place at the right time.

There are lots of jobs left to do, many small things that need to be done but the basic car is ace!

Despite the fact that it is a bargain I still couldn't afford it so now I just need to get the Vitesse sorted and sold!

Some things I need if anyone has them, please get in touch with prices :-)

  • A PI air filter element housing, I have the "log" I just need the "can". Any condition considered.
  • A pair of stainless steel sill trims (I'm poised for a pair on eBay now). UPDATE - they are mine :-)
  • The clock seems to be mullered so I wouldn't mind one of those, nice square thing it is too.
  • The correct round knob twin choke cable.
  • Shadow blue (or black) boot carpet - I've been promised a black Mk2 one so I can try and modify it, we'll see how that can be done.
  • A good Mk1 PI steering wheel (I have a loaner one to try)

Wednesday, April 09, 2008

Latest nail biting developements

Mostly this week I have been doing stuff for the PI.


Monday I got the new tyres mounted on the Gemini alloys, they do look nice now.
Whilst I was at the tyre fitters, Dave called and left a message (phone was in the car whilst I paid for the tyre fitting) The message went "Listen to this...." followed by some lovely 6 pot noises :-) The PI had refused to start on it's 18 month old petrol and flat battery so I asked Dave to recommission it for me and get an MOT - remember it's not moved for 18 months since it's last MOT!


I must take the plastic off the door too
On Tuesday I had a meeting in Birmingham so I loaded the wheels and tyres up and left early to drop them off at Canleys. The car was in the workshop still on it's shitty mismatched 40 year old rubber. It's going to look good on those wheels I thought to myself.
Today Dave texts me to say it's off for an MOT at 5:15. UPDATE - it passed :-)
Tomorrow my parents return from the US and although they don't know it yet they're giving me a lift up to Dave's. I'll take a day off work on Friday and rust proof the PI - it's hardly been outside in the last 40 years let alone see the road. I also need to sort out a choke cable, a battery (the new one put on 2 years ago has died) and fiddle with whatever else to drive it home.


Oh yes, she will truly be mine, soon :-)

Sunday, April 06, 2008

The Isle of Wight Triumph Weekend anyone?

Every year I take a gentle drive down to the Isle of Wight and camp with a load of fellow Triumph enthusiasts from on and off the island. The weekend is something of a fixture in my family calender, both my girls look after me all weekend whilst I enjoy the ale and our little crew of friends forms the usually invincible Quiz Team - OK so I had enjoyed the ale a little too much to know the answer to the tie breaker a few years ago and have never lived it down - who cares how many bottles of champagne are in a Methuselah anyway?

It all happens on the first May Bank Holiday weekend, 2nd to 5th May and costs are modest, £34 for me and my two kids to camp plus a ferry - Tesco Clubcard points are buying mine this year, it's usually around the £50 to £60 mark

There's lots on that weekend, if you prefer a bit more of an active driving weekend, try the Club Triumph Historic Counties Challenge, the HCR. This starts and finished at Canley Classics premises in Fillongley near Nuneaton.

I like the Isle of Wight because it's a good family friendly weekend, you can camp, stay in one of the static caravans or even in a chalet. There's a good atmosphere, with events, excursions, convoys, a quiz, a treasure hunt, a disco, etc all organised for you. You can even get to see me work for a change as one half of the Two Jasons world infamous drunk BBQ chefs attempt to feed 150 Triumph enthusiasts without killing anyone including ourselves. It's been touch and go some years, especially during the lighting ceremony but since we turned unleaded we haven't even maimed anyone.

I like it because it's so casual, if you want to be organised all weekend you can, if you want to drop out and kick back by your tent or in a local pub then that's fine too. There's so much to do on the island that you can't be bored. We've always had reasonable weather for at least a couple of the days. Granted it has in past years been either frosty, wet or bloody cold but it can also be hot, bright and sun burn weather - I have caught a tan there before. One thing's for sure, it's never made any difference to how much we've enjoyed the weekend.

For more details and a booking form got to The Isle of Wight Triumph Site
For more info than you ever wanted to know about Champagne bottle sizes go here