Saturday, September 30, 2006

Today's learning

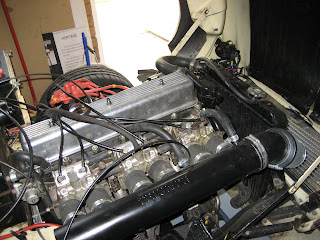
An oil change is an easy thing to do, provided you have the right tools.
  • Draining your oil into a square flat pan is a good idea
  • But not if it has a crack in it and lest the oil out almost as fast as it goes in
  • Pouring the oil out of the pan into an old oil can is a good idea
  • But not if your funnel gets blocked and the oil spills out over the top
  • Hammering a screw driver into the spin on oil filter is one way of getting purchase on it to get it off
  • Hammering two holes causes oil to squirt out of one hole into your eye
  • Staggering about the garage with oil in your eye looking for a rag to wipe your face on is OK
  • Unless you to kick over an old oil container full of waste oil that you forgot to put the top on

As you can tell, today I have been learning that I should not play with oil first thing in the morning.

It's all cleared up now, ready for some trunnion oiling - another messy job! Trouble is today I have some family stuff to do that entails me getting dressed in tidy clothes - same tomorrow! Snatching a couple of hours at the car here and there will have to do.

I also replaced those H4 P43t pattern bulbs with my nice new eBay specials - the correct bulbs for my bowls - H4 P45t 100 watt mains, 80 watt dips.

I have ditched my locking wheel nuts for standard ones, no use making it complicated if I have to change a wheel in the dark. I have a new set of nuts so I can change them all and consign the old ones to spares. I also have a new set of studs for the rear, I will try and change them too - the car puts a lot of power through those 8 studs.

Friday, September 29, 2006

Sucky sucky ten bucks?

Bought myself a vacuum gauge off eBay for a tenner - we'll see just how much this engine sucks and how well it stacks up to the factory figures. You see a PI relies on good vacuum to adjust the fule delivery - something I am now accutely aware of following Guru Pearson's wise teachings. (James, where's that photo??)
Playing with the metering unit today I found the right feeler gauge to insert between the datum and the roller by trial and error - it's a metric feeler with "20" on it so I'm guessing .2 of a millimeter? That converts to 0.007874 of an inch which bears little resmblence to the "couple of thou" comments from the Guru - I hope I've done it right!
I ran the car for a while with the feeler gauge inserted, a bit of gaffer tape could have held it in ofr a drive around but I decided that it seemed so much better that it's was there or there abouts. Any bigger and the engine died, any smaller and the effect was negligable.
So I set the engine at TDC, took the metering unit of the distributor drive and carefully put a mark on the rotor so that if I did move it accidentally at least I could get it back to where it was meant to be!
I also replaced those suspect banjo bolts whilst the MU was out of the car, impossible to do with it situ.
The feeler gauge was cut and stuck with Araldite rapid, I left it a good 20 mins before reassembly and reconnection. All went well and she fired up quite easily after that - a little coughing and spluttering whist the air cleared from the fuel lines but sounded fine. I had changed all the plugs for some new ones I had "in stock" so I'll take the car out for a thrash and see what the effects are - will the plugs be black??
Here's a photo if the modification, the red wire is just holding the rollers hard back against the datum point so I could get in there with the cut feeler gauge and the araldite. Click on the photo to get it full size and you can clearly see the piece of feeler gauge :-)

Fuel Gauge fault traced

The full story is that the gauge worked fine for years. I took the tank out and welded in a new bigger bore outlet for the PI, washing the tank and generally having it at all sorts of angles in the process. I think the gauge worked fine after that but immediately I'd done the welding I replaced the tacho cable and disturbed the instruments in the process. The gauge then read zero so I pulled it out and found a dodgy earth, I put a new terminal on the earth (I think this is the earth for the light and nothing to do with gauge operation). So then the gauge read full (wrongly but I thought it was OK).
Last night my brother in law came round (I'm recovering some lost data from his laptop for him) and so I pressed him into fault finding service - he used to race a Vitesse in the early 90's and is a lifelong Porsche technician so he can be very useful :-) Testing voltages and resistances, pulling wires off the sender and joining them together all indicated that there was an intermittent fault with the sender. As the tank was quite empty I could pull the sender out and sure enough, the fine wire of the variable resistor was broken.
There was nothing at all wrong with the gauge!
We tried to solder a repair but the old wire refused to take any solder so in a bodge I managed to weave some fuse wire into the right place and got the sender working. We reassembled it all and it seems to be OK - I'll get another sender ASAP and hopefully replace it before the RBRR!
The computer fixing then swallowed the rest of the evening so my metering unit modification will happen today!

Wednesday, September 27, 2006

An interesting day

I went up to Canley’s yesterday to help Dave get the venue ready for the driver’s briefing and to get him to lay hands upon the Vitesse. I reciprocated by laying hands on his Stag, dredging up my knowledge of SU fuel pumps from 25 years ago (my first car was a Morris Minor) and being entrusted with rebuilding the distributor internals - first time I'd ever seen dual points, interesting!

The Vitesse had been pretty good on the way up, the fuel pump behaved and felt cool when I tested it. I ran in daylight with the lights on dip to ensure nothing got too hot in my new wiring – an hour+ running like that was fine. The fuse holder was warm but not excessively hot – I didn’t burn my fingers again! I bought a new one anyway to be sure.

There is an annoying vibration over 70 mph, it’s one I can feel through my backside, the steering wheel is fine. It feels like driveline – the prop is new so could it be rear wheel balance? These tyres haven’t been on a year and were fully balanced when fitted – I’m not 100% sure they were well balanced as they seem to have a LOT of weights on. I might take them down to my local tyre place and see if they can improve them.

I though the engine had been running rough, maybe a slight misfire? I sometimes think I get paranoid about these things! I’ve been playing with the timing and wasn’t very happy with it, it wouldn’t idle properly and was reluctant to start. It smelt very rich, the plugs were fouled (I must pull them again after yesterday's 200 miles). I tinkered on the way up and got it to feel better – it steadfastly refuses to pink and pulls OK through the rev range. It’s now running something like 14 degrees of advance and as Dave says, it really shouldn’t need more.

Some fiddling with the metering unit hasn’t improved the rich running but Dave was able to get the mixture leaner by inserting a feeler gauge between the shuttle and the control plunger roller – you can adjust this to compensate for wear but mine is adjusted to the max. This may help explain http://www.lucasinjection.com/Lucas%20page%2011%20fig%2010.jpg from the very useul pages of http://www.lucasinjection.com/

There are several ways to adjust the metering unit, it is something of a black art and does seem very complicated. However, as I understand it, what needs to happen is the shuttle travel needs to be reduced. This can be done y either adjusting the control plunger roller to be closer to the shuttle OR, as in my case when you’ve exhausted that range of movement, you can add material to the shuttle. The tolerances inhere are really fine so Dave recommends running the car at idle, selecting the right gap by inserting a feeler gauge to lean off the mixture – you can hear the engine note change and go past the optimum. Once you’ve selected the right feeler gauge (Dave thinks about 4 thou should do it) then cut the end off the feeler gauge and stick it onto the shuttle. Araldite should be OK, I could swear I've seen this method written up in an article - solder was used to stick the feeler gauge on the shuttle - I can't remember where that was though!

The Metering Unit will have to come off the car to do this (the sticking bit, the rest has to be done whilst it’s running) but that suits me as I can then renew the two banjo bolts (injectors 5 & 6) that are impossible to get to with the MU on the car.

I should be able to do this in the next couple of days but we’re getting close now!

I never did get the car on the ramp to look at the exhaust, however I did test my ear plugs on the way back :-)

Another annoyance is the fuel gauge, I thought I'd fixed it but now it’s always reading full! How the hell do I trace this fault? Apart from the obvious visual inspection for crap connections? Any ideas??


Tuesday, September 26, 2006

The finished headlights


Here are the relays, nestling up in the dry and out of the way yet accessible if needs be.
And another shot supposed to show them in context but I was distracted by my nice engine!

Monday, September 25, 2006

Ouch!

Well what have I learned today?


When something is smoking, it is not a good idea to touch it because you WILL burn your finger!


I didn't get the time I needed at the car tonight, I fiddled with the timing and it seemed to be running better so I jumped in and sped off down the road. Suddenly, no lights!

Damn!

That's when I realised what the problem was, well after I blistered my finger! That spare fuse box I installed had been in mt spares stock for a few years, it was well tarnished. I "cleaned" it up a bit when I fitted it but not much, in fact not enough! the fuse was barely making contact and the contact it was making was crap. I removed it, after it had cooled down a bit! I then gave it the once over in the sand blaster cured the corrosion. I refitted it all, put the lights on and then, this is the good bit, I used the temperature probe on my multimeter to see if it was still too hot! It was hot but it never got too hot!

The main issue was that I lost a bit of confidence in my wiring! The car's all together now and ready for a run up to the RBRR driver's briefing at Canley's tomorrow. It will be both a test and shake down - finger's crossed that the whole thing behaves :-)

The only thing I really need to do now is sort that exhaust out - the mild steel manifold has a rather battered collector an the fit isn't great - I've adjusted it a few times but I really need to get it up on a ramp and sort it properly. I'd rather not have to replace the exhaust now but if I need to I will - I like a single pipe.

Saturday, September 23, 2006

Well that was a mixed day

Headlamps completed - relays fitted, second fuse box added, wiring tidied up and loom taped up, 100watt mains in (OK so they are the wrong bulbs but we'll gloss over that - eBay has turned up a pair of the correct P45t fittings - 100 watt mains for £6.50 delivered - they popped up and I sanpped them on a buy-it now). It's all nice and neat under the bonnet now.

Fired her up and noticed that the fuel gauge was registering zero, not right. Temp gauge worked fine but fuel gauge didn't! Fiddled about under the dash and found a rather dodgy earth connector (just the wires twisted round the mounting) made up a new eye connector and reinstalled it all. Works fine.

I'd always wanted to fix the wipers on this car since I've had it - they work but don't sweep the whole screen. I'd been told that the gear in the woper motor was probably wrong, it should be stamped 160 and was probably stamped 130 - sure enough it was. I swapped the whole motor out for a spare that I checked had 160 on it, no damn difference :-(

Took the car out to fill with petrol, runs like a dog over 3500 rpm - grrrrrr. I think the timing is all out after the electronic ignition and Magnecor leads fitting - I haven't really used it in anger since.

Right tomorrow is full of family stuff, I may not get a chance to look at it, might have to wait until Monday.

I also need to get the exhaust sorted so it's up to Canley's on Tuesday for a quick bit of ramp action and then the RBRR driver's briefing. I was toying with going to go to the Plough briefing too but work committments have scuppered that - I would like to give the car a bit more of a work out but it looks like that's off.

Still I'm glad those jobs are done - just need to get the most important one sorted now, get the damn thing running nice!

Thank you Google, I've seen the light and it's Japanese!


OK maybe not Japanese but certainly Johnny Foreigner is to blame :-)

Half an hour Googling has revealed the sitiation.
The Cibie lenses accept the Halogen H4 P45t bulbs as opposed to the more usual Halogen H4 P43t (three prongs).

Apparently these lenses were meant for a Kawasaki motorbike! Although I found most of the helpful stuff on a GT40 discussion board.

Anyway, I've found that I can either buy some new bulbs of the correct type OR buy some adapters OR change the lenses OR just bodge the buggers in anyway!

I think I'll buy the right bulbs :-) Now to find me a motorcycle shop that stocks some 100w mains. Ooooo - you can get 160w mains, now that's just silly.

The other bulbs can go in the Sixfire, I think that's already relayed up for high power headlights!

Grrrrr - bloody bulbs


So I've done my relays, wiring, fuses and whotnot, I've even taped up the loom so that it's nice and tidy using proper loom tape.

As an aside, if you are thinking of doing some loom work, get some of this stuff it's really easy to use and looks excellent, far better than the self adhesive crap!

So I come to put the new bulbs in and guess what, they aren't the same! The are marked the same with H4 although the new ones are marked H4 U. The new ones are what I'd expect, with 3 prongs. The old ones are altogether larger and round with pressed location dimples in them. They fit snuggly in the Cibbie lenses and are rtained by two clips.
The new ones will fit but look awkward and leave a gap between the bulb and the lense - they just don't look right although they work fine and look OK from the front.
So, what's going on!!?? Thoughts anyone!?

Wednesday, September 20, 2006

How many things can get in the way?

Well those nice chaps from Auotosparks came up trumps as promised and I have all the neccessary parts to finish the job so last night I went out to get stuck in, then my brother-in-law turned up. He had crashed his laptop and was somewhat upset as it had all his photos on it and he had no back up. I came into the house and spent the next 3 hours trying to salvage it - didn't succeed as I need some means of recovering the files off the laptop onto some other media that it will recognise in it's knackered state. Never mind, a quick trip onto eBay to get the neccessary and he'll be sorted soon as it arrives.
Nil progress on car.
Today I had to go out at 5 and wasn't back 'til late, where upon a cold beer and supper was waiting for me so I settled into that and yup, no progres on the car!
Tomorrow I have to go to Manchester for a couple of days with work and you guessed it - no progress on the car!

So a week will go and I'll have done bugger all!! Grrrrrr

Roll on the weekend, I think I have some "must do" DIY lined up so I am hoping to get out of that and lock myself in the garage until the job is done!

Monday, September 18, 2006

Autosparks - what nice chaps!!

I usually get my wiring odds and sods from Autosparks ever since I met the boss man at a show a few years ago. So impressive what his knowledge that he was able to produce exactly the correct connectors, wiring gauge and colour for a rear light rewire on a Herald that it's stuck in my mind ever since.
Anyway, I ordered up some stuff to do the headlight relay conversion, including some inline fuse holders - one to use and one for "stock". I came to do the job yesterday and found that the fuse holders were incomplete - basically I had 4 male ends, 4 springs but no female tops and no connectors. A picking cock up, never mind. But even if the holders had been complete they would have been too tight on the chunky 35 amp cable I wanted to fit one into - a rethink was needed.
So I called them up, they were suitably apologetic and saif they'd get the replacement parts out to me asap so I could make up 4 complete holders (I only ordered 2 so there's a bonus in there for me).
I took the opportunity to have a chat about the job as I was a little uncertain on the gauge of earth wire needed. The guy was interested and took the time to chat it through, working out the amps per side, wiring required and even solved the problem of the fuses - put one in each side of the feeds to the headlights for now.
I may, if I get my confidence up, put another fuse box in the front and do what others have done, have a fuse for each light. I'm kind of tempted by some new fangled circuit breakers but they are expenive at £12+ each, especially when you want like 6 of them. There are some really nice panel mounted ones that would do the job but they are £15 each - you can blow a lot of fuses for £100 worth of circuit breakers!

Keep it period, it's cheaper :-)

Sunday, September 17, 2006

No Kaboom - confirmed!


Here's my welding all tidied up and painted. I used a 3/8 barbed hose end - apparently called a "life saver" by the hydraulics place I got it from, no idea why! I welded it to the tank using my Mig and then silver soldered it to make sure itt was fluid tight - I tested it with water and it weeped, only a tiny bit but a miss as as good as a mile here so I tried again and it leaked again, worse! So, I went in search of something I could use to ensure it was 100% fuel safe. I found a two part epoxy repair putty that was very fluid, flowexed well and hardened in only 10 mins. It was specifically recommended for unleaded fuel and seemed a better bet than just plain Araldite which was my intuitive response. So I mixed some up, worked it in and left it to set. A quick test showed it was water proof, I put a little air pressure in the tank too and it was fine. So I emptied the tank, dried it out as best I could and refitted it all. I took the opportunity to replace all the fuel pipes with new Aeroquip pipe of 3/8 bore - I had an off cut from making the main fuel line - just enough to do the job but no spare to make a neater job. I put a gallon of petrol in and ran the pump - lovely! No drips, leaks or damp patches on the tank, one hose needed pinching up. The Aeroquip hose is very tough stuff and the jubilee clips really need to be at the edge of their spec to hold it tight - I could replace it all with proper threaded fittings but at that's for another day I think.
The car fired up fist time - I'm still getting used to the PI starting regime, it's not like a carb engine at all. She ran with little fuss so I left it at that - I put a couple more gallons of petrol in and that was Satuday's work done. I'll take it for a run and fill it up sometime in the week.
Next job for Sunday was to put some relays in the headlights and some uprated bulbs.

Saturday, September 16, 2006

No Kaboom!

Well I have now welded a fuel tank and lived to tell the tale!
I drained and cleaned the tank - just washed it out with water. There was surprisingly little crap inside, a few flakes but probably the cleanest tanls I've ever seen!
I welded in new a 3/8 outlet at the base of the tank and plumbed it all back in without the helper pump using 3/8 hose. All the returns from PRV via cooling coil and from the metering unit now go straight back into the tank like a 2.5 PI rather than through the filter as I did have them - I need to sort out a better blanking plug for the filter. I also repositioned the filter slightly lower - shoudl be able to make a boot floor now. I wish I could remember who offered me some plywood to do this with!
Anyway, it all seems petrol tight and working (I've fired it up) but I only had a one gallon container to save some petrol, the rest went into the Sixfire. I've bought another can for the RBRR so at least I can fill two up and out a couple of gallons in it before taking it to a petrol station!
I also changed the tacho cable, it was knackered but still working.
Tomorrow, provided all is well again with the fuel system, it's 100 watt headlight time, refit the front grill and an oil change.

Tuesday, September 12, 2006

Breathing easy

A little trip around Reading's plumbings and builder's merchants has turned up the neccesary 80mm pipe to make up a filter housing.
OK it's an 82mm grey soil pipe 45 degree bend - cut down fore and aft to allow the K&N to fit under the bonnet and to the side of the radiator - it's pretty tight and I've yet to refit the grill but I think it'll be OK.
I'm disappointed that the chrome face of the filter is facing the fresh air but that's the way it ended up. I have seen a Pipercross filter that has some gimmic "vector cone" intake that takes air into the centre of the cone - that would be better so I'm going to see if I can get one of those. The K&N is OK and didn't cost me much - it's off a boy racer's Nova! Another cheap and nasty eBay special.
Here are some photos of the finished job, I sanded the pipe to provide a key and painted it black so it doesn't look so obvious!
There is no real support for the filter or the plenum chamber but it's pretty solid with all those jubilee clips! If it sags I'll make up some support brackets.
The little bit of gaffer tape you see on the bottom rail of the bonnet is to hold the thing together - a little remedial bodywork is needed here. A wintder project may be to find some of the right paint and tidy up some of the scabby bits on the car.

Sunday, September 10, 2006

Now that is GREEN!

eBay.co.uk: Triumph Herald Saloon / Convertible 1960 (item 270026084918 end time 13-Sep-06 10:04:06 BST)

Spotted on eBay down under - you're sure to get noticed in this!! I was looking for a Coupe to see what prices are like these days - I've got a couple of years before my eldest daughter needs a car and she's set on a Coupe, the earlier the better but anything will do - ideal spec would be one on a Mk2 chassis with tatty paint but bodily sound - that's so we can paint it! She has made it clear that Alpine Mauve and Spa White is her preferred colour scheme.
Anyway, it's not a super serious search at the moment but of the right car came uup I'd be duty bound to buy it, god knows where the money would come from, maybe I could sell a kidney?

Saturday, September 09, 2006

Breath easy

OK so it's not ideal but it's better than nowt - a cheapo K&N off eBay (just to see if it'll work) plonked onto the plenum - yes it clears the inner wing but it fouls the bonnet top - angle it down a bit and it fits BUT it's not in the right place. I think reposition the expansion bottle and some 80mm tubing should allow me to put it right in the cold air flow at the front.
I've been told that there is a soil pipe made at 80mm but I can't seem to find any in the local DIY shops, I've been told Jewson may have some so I'll try there in the week. I've got some travelling to do next week so I may stumble across one, will throw a spare plenum in the boot of the Eurobox just in case :-)
I have a neighbour who is a plumber, wonder if he has anything in his van - right, I'm off on the scrounge!

We're really doing it all today - fuel air and spark!

Here's the fuel part having dealt with the sparks below - a fuel pressure gauge, it T's off the metering unit (and that union was damn expensive - £25!) - at the moment it's a lash up, I wasn't going to leave it permanently in the car but I may change my mind! Posted by Picasa


And the other end is just gaffer taped through the quarterlight! The gauge was an El Cheapo and not being damped in any way is hard to read - if I do go permanent I'll need to find a better one more in keeping with the rest of the instruments - I've seen industrial glycerin filled ones that look ideal but are expensive. Also, with my history of fuel in the cabin I will go for some armoured hose!


A quick change round of the pumps shows me that the original pump (the one that draws over 5 amps) is in fact kicking out the ideal pressure - between 100 and 110 PSI (the needle moves about a bit but between the right numbers!).
So, it may draw an amp more than the spare but at least it pumps enough to run the car properly. This is the first time connected to with the helper pump and cooling coil. I now need to do a bit of sustained running with it like this and ensure we don't get cavitation again.
I could hack about this pump and the spare to put the high pumping of this one with the low current draw of the spare's motor but I am reluctant to do this as I could end up screwing up both! One for me to ponder.

Following up on leads

The new leads arrived as promised from the TSSC, I am impressed. Of course I have since been shown them a few quid cheaper at http://www.rallydesign.co.uk/ just watch the VAT and postage charges!
So I went into the garage today with a few jobs in mind - first off I would fit my new leads. Removing the old leads, that didn't look at all bad, revealed a bit of a horror - the king lead literally fell apart in my hand - the terminal stayed in the distributor cap and the rest of the lead came off - it wasn't jammed in as I removed what was left with my fingers. No 6 was similar, the crimped end wasn't - if you see what I mean!
So, on with the new! These are nice leads, real thought has gone into their manufacture - each lead is numbered, the plug caps are angled appropriate to their position (some are straight) the dizzy cap connectors are right angled so clearance isn't a problem now and finally you get some little clips to tidy them up.


Here's the installation, I haven't clipped them up yet as I'm going to now fit the electronic ignition I bought from the States and then do the timing so things might move about a bit.


So, the verdict is - expensive but a real quality product. Do they increase performance? Could I have spent my money better elsewhere? Pah - I don't much care, they are an improvement over the old ones which would have let me down sooner rather than later. They are probably overkill and they do look a bit Max Power but I'm happy :-) Posted by Picasa

Thursday, September 07, 2006

Well I never!

I was looking for solutions to my plug lead clearance issues - with the mechanical drive take-off for tacho and metering unit the dizzy sits proud, it puts the straight entry plug leads in contact with the bonnet top. I suspect some of my misfire issues have been caused by this. I have found a loose plug lead twice now and despite careful attention to making the connection at the dizzy cap it was loose again after my last run out. I'd been recommended to try Magnecor leads so off I went to find some. Doing my usual price comparisons I couldn't find anyone supplying really cheaply then I remembered a conversation with fellow TSSC member Tim Bancroft - he said he'd bought his from the TSSC, I had dismissed this as silly, because the TSSC shop is always expensive, isn't it? Well, I found something quite surprising - the Triumph Sports Six Club shop was in fact the cheapest for these leads and had the lowest P&P charges too, not way cheaper but nevertheless the best price! So I called Nigel in the shop and had a chat - as ever he was very helpful and confirmed that the leads have a right angle cap, were in stock and would be with me tomorrow. So I paid my money and gave my business to the TSSC.
Triumph Sports Six Club - Competition Lead Sets (8.5mm)

Cue an avalanche of people saying "I got my leads from Bla Bla and they only cost 50p" -go for it!

Tuesday, September 05, 2006

Pressure? What pressure?

I popped down my hydraulics place again, saw Steve (we're mates now) and got a union and hose to attach my pressure gauge to the metering unit - now we can see what's going on. Sure enough there it is, a problem - only 80 PSI. It needs to be between 100 and 110 psi. ASdjusting the PRV and swapping out the PRV made no difference - the pump (spare) is not delivering enough pressure at tickover.
So with the gauge gaffer taped to the dash and the pipe coming out of the bonnet I took it to the TSSC meeting and for a blast - at no point did the pressure get over 90 psi and at full throttle under load it dropped to just over 70 psi (and the car felt strangled) As the injectors trigger at 60 psi (sp the book says) I suspect that's getting close to their limitation.
So, stuff to try - change the pump for the original, the one that draws more amps than the spare and see what that does. Can't do it now, need some sleep as I'm off to Norwich for a 9am meeting another re-organisation, I wishe we could get it right for more than 12 months!
Nevermind :-)

Now that's FUBAR!

I recently had a ride in fellow CT member and Blogger Dave Powell's Spit, the Beast. Very rapid and very well prepared. Unfortunatley the car ate a valve on the way home from the track day - now that's a real shame. More details on Dave's blog where you can follow the trials and tribulations http://www.crazyspitfire.blogspot.com/

Monday, September 04, 2006

Facts & Figures

Well the pumps seem to have worked, it never stuttered or stalled on a 150 mile round trip.

I used A roads through towns etc for half of it then blatted back on the motorway at an indicated 80 for the other half - those 150 miles used 6.5 gallons of petrol - that's 23 miles to the gallon. Doesn't sound that good but when you consider that it used to struggle to reach 10 I'm reasonably happy!

I also took the opportunity to test the temperature of the pumps - under the cooling coil on the spare (the coil was not connected) the temp was 48 degrees, the actual pump body was 38 degrees. That all seems quite hot to me.

The car's still not 100% - down on power at the top end, tick over is crap (too low and it will stall eventually), the misfire still seems to be there occasionally and that vibration in the drive train is still there at over an indicated 80. It is not that easy to start and feels like it's running rich.

So, what to do - well first off I have to consult with the guru and see what could be the problem(s). There's a limited time to sort it. I can fit that electronic ignition and check the timing - I also want to double check those damn tappets but I feel like I'm just poncing around the problem rather than tackling it.

Sunday, September 03, 2006

It's fun fun fun all the way!

The day wasn't over so I decided to have a crack at the car - poor running first, checked tappets and equalised them all, only one was way out - No 5 (exhaust) had opened up, I couldn't see any reason but there was the cause of my noisey top end.

I had a look at the plugs, 5 & 6 dark the others OK, well lighter.

Wiggles a few leads - No 6 was loose - very loose! Could that be it? Put it all back together and yes! There you go, check the bleeding obvious first.

Now the pump - a little head scratching and a look on the bench to see what was in the parts bin. The car now sports a Facet low pressure, high flow pump plumbed upstream of the Lucas pump (the temp one at the moment without the cooling coil connected). This should help the Lucas pump draw fuel all the time - we''ll see.

Also I took the opportunity to play with my newly replaced multimeter (thanks Draper!)- pump one (the one that's properly mounted and has the connected cooling coil) draws 5.25 amps, the spare draws 4.24 amps. Also, the meter has a temp probe that I stuck in the spare - 36 degrees under the cooling coil - whatever that means!

So the boot now looks like a distillery!! The next long trip I do I'll take my testing kit and start to see if I can figure out what's going on here - first it's down to Pirtek tomorrow to get some unions to plumb in a pressure gauge I think!

Anyway, it's late, I smell of petrol - time for a shower and some rest!

Close but no cigar

Hmmm, the trip out to the Triumph World picnic did not go according to plan - Oh we got there OK with both cars and had a good day there. Catching up with old friends was good and although the morning looked wet, the weather turned out to be great.
As I pulled up I heard the fuel pump noise change and the engine stopped - cavitation!


Arse!


So with lots of people having a look I canvassed opinion from the gathered PI intelligenci. There weren't any new ideas but some rationale for old ones.

The tank set up probably needs revising - it's a syphoner at the moment and that could be changed to a drainer by adding a union. Dave at Canley's recommended making a swirl pot inside the tank - I like this idea but I'm not sure my welding is up to it - maybe braze it. Also, heat in a petrol tank could be fun :-)

A helper pump could be one solution rather than the above surgery but that's two pumps = twice the potential for problems.

Also, the spill from the PRV and the Metering Unit currently go back through the filter housing - like the early TR5 plumbing. One of the theories discussed was that the fuel, warmed from the Metering Unit and PRV (as it's gone round the pump in the cooling coil) could be one of the problems. The warm fuel should really go back into the tank - the rationale being that with such a large volume of cool fuel it will absorb the heat. I could use the syphoner outlet as a spill inlet from bother the PRV and Metering Unit using the current "T" piece.

So, armed with all this info I set off for home, yup, she started to stutter and was in danger of dying on me - I knew the next thing would be the engine would stop death. HOWEVER! I was prepared, I had a fully built up spare pump, cooling coil and PRV - I plumbed in the spare pump (2 minute job if you leave it all unsecured) and was ready for the off again. So I got home with the spare but it's still not right. I have a slight misfire and I suspect that's No6 or No5 and that could be those troublesome banjo unions on the Metering Union - I have new ones but fitting them is a pain as you need to pull the Metering Unit out and then re-time it.

So now I'm sat with a cup of tea thinking "What the hell am I going to do and when? I've got 5 weeks!!!

More tea I think.


J